[译]通讯录和活动提醒
By robot-v1.0
本文链接 https://www.kyfws.com/applications/address-book-and-events-reminder-zh/
版权声明 本博客所有文章除特别声明外,均采用 BY-NC-SA 许可协议。转载请注明出处!
- 21 分钟阅读 - 10237 个词 阅读量 0[译]通讯录和活动提醒
原文地址:https://www.codeproject.com/Articles/28434/Address-Book-and-Events-Reminder
原文作者:SHRIDHAR TL
译文由本站 robot-v1.0 翻译
前言
Allows to maintain and backup your contacts and also maintains a reminder. You can store data in any of the three different databases like Microsoft SQL Server, MySql, Microsoft Access
允许维护和备份您的联系人,也维护提醒.您可以将数据存储在三个不同的数据库中的任何一个中,例如Microsoft SQL Server,MySql,Microsoft Access
介绍(Introduction)
这是使用C#开发的简单实用的实用程序,可在Microsoft .NET Framework v2.0或更高版本下运行.此工具有助于维护您的联系信息,例如姓名,地址,电子邮件,电话等.这也只是将事件保留为已存储的数据并以该版本显示,并且会进行更新以提醒您及时使用增强的新主题特征.(This is a simple but useful utility developed using C# which runs under Microsoft .NET Framework v2.0 or higher. This tool helps in maintaining your contact information such as Name, Address, E-mail, Phone, etc. This also just maintains the Event as stored data and display in this version and will be updated to remind you on time with enhanced and new themed feature.)
该应用程序是为多用户创建的.它使用来自用户的唯一凭据,并在请求时显示其相关数据.它还包含即使具有密码保护也可以XML格式或加密格式备份数据的功能.可以使用默认存在的架构或您创建的架构来创建此备份.模式是指有关要使用备份实用程序传输的用户详细信息的指令集.该应用程序可以将数据存储在三个不同的数据库中,例如Microsoft SQL,MySql,Microsoft Access.(This application is created for multi users. It uses unique credentials from the users and displays their relevant data when requested. It also contains the facility for data backup in XML format or Encrypted format even with password protection. This backup can be created using the schemas which exists as default or the one created by you. Schema refers to the set of instruction about the user details to be transferred using Backup Utility. This application can store data in three different databases like Microsoft SQL, MySql, Microsoft Access.)
数据库设置(Database Settings)
此应用程序需要数据库连接来存储联系信息.该数据库必须是Microsoft SQL Server或Microsoft Access((This application requires a database connection to store the contact information. The database must be either Microsoft SQL Server or Microsoft Access ()*** .mdb(**.mdb*)**)数据库.首次启动应用程序时,将显示以下消息框,指示是否设置数据库连接.(*) database. When the application is started for the first time, the following message box will be displayed whether to set the database connection or not.*)
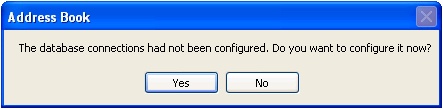 单击上图中的是,这样将显示"设置"表单,如下图所示:(Click yes in the preceding figure, so that the Settings form will be displayed as shown in the following figure:)
 在此表单中,选择需要用于存储的数据库类型.使用复选框可在系统启动时自动启动应用程序.点击保存按钮.然后将根据您的选择显示数据库连接表单.(In this form, select the database type which you need to be used for storage. Use the check box to start the application automatically at system startup. Click save button. Then the Database connection form will be displayed according to your selection.)
SQL数据库设置(SQL Database Settings)
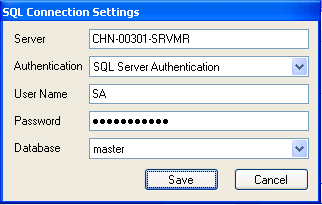 在前面的表格中,键入安装的SQL实例的服务器名称,然后选择身份验证模式以使用Windows身份验证还是使用SQL Server身份验证(需要用户名和密码).如果提供的信息正确,并且可以建立与数据库的连接,则可用数据库列表将显示在列表中.从列表中选择一个,然后单击"保存"按钮.(In the preceding form, type the Server name of the SQL instance installed and then select the mode of authentication whether to use Windows Authentication or SQL Server Authentication (requires username and password). If the information supplied is correct and if the connection to the database could be established, then the list of databases available will be shown in the list. Select one from the list and then click Save button.)
访问数据库设置(Access Database Settings)
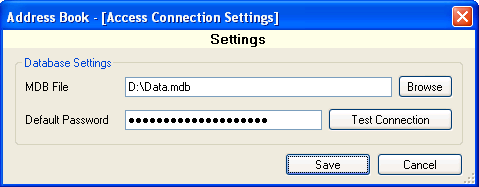 在上述表格中,选择Microsoft Access数据库文件((In the preceding form, select the Microsoft Access Database file ()*** .mdb(**.mdb*)**),方法是浏览系统,然后输入数据库的密码(如果有),然后单击"保存".(*) by browsing the system, then type the password of the database if any and then click Save.*)
MySql数据库设置(MySql Database Settings)
 在前面的表格中,键入安装数据库的服务器名称(如果安装在同一系统中,则为127.0.0.1)以及用户名和密码(如果需要),然后从列表中选择数据库.如果未显示数据库,则应用程序无法连接到数据库.然后检查提供的输入是否正确.然后单击保存按钮以保存更改.(In the preceding form, type the server name where the database is installed (127.0.0.1 in case installed in the same system) and the username and password if required and then select the database from the list. If the database is not displayed, then the application couldn’t connect to the database. Then check to see whether the inputs provided are accurate. Then click the save button to save the changes.)
数据库选择结束后,应用程序将重新启动以应用设置并连接到数据库.(When the selection of database is over, the application will restart to apply the settings and to connect to the database.)
当应用程序重新启动时,应用程序将最小化到托盘.单击任务栏图标,然后单击登录或联系人.(When the application restarts, the application will minimize to tray. Click on the tray icon and click Login or Contacts.)
首次登录(First time Login)
 由于此程序需要用户凭据才能登录,并且该凭据首次不存在,因此它将要求创建一个新用户.要创建新用户,请单击(As this program requires user credentials to login, and the credentials do not exist for the first time, it will ask to create a new user. To create new user, click on)是(Yes)显示对话框上的按钮.当您单击(button on the displayed dialog box. When you click the)是(Yes)按钮,将显示一个用于管理用户的表单,如下图所示:(button, a form provided to manage users will be displayed as in the following figure:)
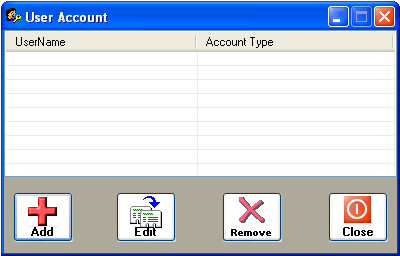 在前面的表格中,网格显示用户列表及其帐户类型(无论是管理员还是受限用户).(In the preceding form, the grid displays the users list and their account type whether Administrator or Limited User.)
管理员:(Administrator:)这种类型的帐户对应用程序拥有全部权限,例如创建,编辑,删除用户.它还可以更改其他用户的密码并查看其他帐户的联系人,但是无法编辑或删除他们.必须至少有一个具有管理权限的用户.(This type of account has full rights over the application like creating, editing, removing users. It can also change the password of other users and view the contacts of other account, however cannot edit or delete them. There must be at least one user with administrative rights.)
受限用户:(Limited User:)此类用户无法访问用户帐户,但可以使用提供的选项更改其密码.此类用户添加的联系人可用于管理员帐户,但其他帐户添加的联系人无法使用此帐户查看,而共享联系人除外.(This type of user cannot access user account, but can change her/his own password using the option provided. The contacts added by this type of user are available for the administrator account but the contacts added by other accounts cannot be viewed by this account other than shared contacts.)
添加新用户(Add New User)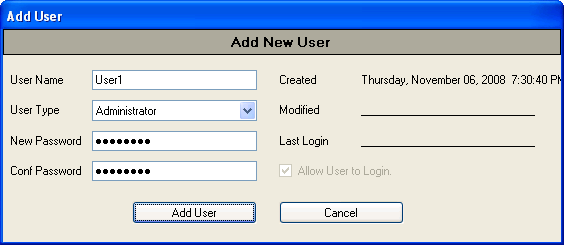
在上面的表格中,键入用户名,帐户类型和密码.然后选中提供的复选框,该复选框用于允许用户登录,此功能可用于限制用户登录而不删除帐户.在编辑帐户时,此表单还将显示有关用户的详细信息,例如,他何时创建帐户,上次修改帐户的时间以及上次登录用户的时间.单击添加用户按钮以添加用户.然后,该用户将被添加到用户帐户.(In the above form, type the Name of the user, type of the account and the password. Then check the check box provided which is used to allow the user to login, where this functionality can be used to restrict a user from logging in without deleting the account. When editing the account, this form also displays the details about the user such as when he had created the account, when the account had been last modified and when the user had been logged in last. Click Add User button to add the user. Then the user will be added to the User Account.)
请按照前面的步骤操作,并根据需要添加任意数量的用户.然后单击"关闭"按钮(第四个按钮)以保存更改,然后将显示"登录"表单,如下所示:(Follow the previous steps and add as many users as needed. Then click the Close button (fourth button) to save the changes and then the Login form will be visible as shown below:)
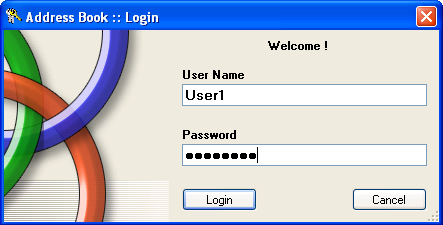 在"登录"表单中,键入"用户名"和"密码"中的任何一个,以登录和查看,添加和编辑联系人.(In the Login form, type any of the User Name and the Password to login and view, add and edit the contacts.)
联络表格(Contacts Form)
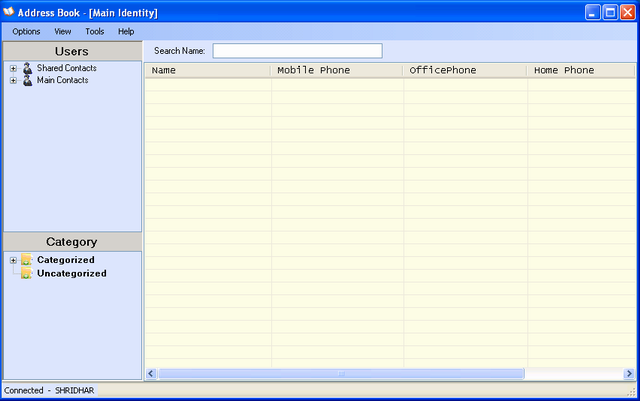 上面的表格显示了当前用户添加的联系人列表.要查看特定用户的联系人,请选择左侧面板上显示的用户名,然后从左侧面板中双击类别.如前所述,受限用户只能查看其自己的联系人以及其他用户共享的联系人.(The above form displays the list of contacts added by the current user. To view the contacts of a particular user, select the user name shown at the left panel and then double click the category from the left panel. Limited user can view only her/his own contact and the contacts shared by other users as previously mentioned.)
保存的联系人大致分为两类,一类为"分类",另一类为"未分类".所有不属于任何类别的类别都位于"未归类"下,所有添加的新联系人都属于此类别.要对联系人进行分类,只需选择所需的类别并右键单击它,然后单击新建->联系人即可将联系人置于该类别下.(The contacts saved are broadly divided into two groups, one is Categorized and the other is Uncategorized. All the categories which don’t come under any category are placed under Uncategorized and all the new contacts added come under this category. To categorize the contact, just select the required category and right click on it and then click New -> Contact which will place the contact under that category.)
添加新类别:(Add New Category:)要添加新类别,请从左面板选择Categorized组,然后右键单击,然后单击New-> Category.一个新类别将添加到列表中,并且将要求您命名该类别,该类别将不接受默认名称.这些类别可以嵌套,并且不受限制.您不能在同一组下添加已经添加了相同名称的类别.(To add a new category, select the Categorized group from the left panel and then right click and then click New -> Category. A new category will be added to the list and you will be asked to name it which won’t accept the default name. These categories can be nested and are unlimited. You cannot add a category with the same name already added under the same group.)
添加新联系人:(Add New Contact:)单击选项->新联系人(快捷键:按Ctrl + N),然后在不同类别中键入所有详细信息,这些类别在选项卡中分开,例如姓名,家庭,业务,个人等.此表单看起来类似于Windows通讯簿-新联系人.输入有关该联系人的所有详细信息,然后单击"保存"按钮以保存该联系人.继续添加所有联系人.每次添加时,上面的表格都会填充联系人.如果没有,请单击视图->刷新或仅按键盘上的F5键以填充列表.(Click Options -> New Contact (Shortcut: Press Ctrl + N) and then type in all the details in different categories separated in tabs such as Name, Home, Business, Personal, and other. This form looks similar to Windows Address Book - New Contact. Type all the details about the contact and click on the Save button to save the contact. Continue adding all the contacts. The above form will be populated with the contacts as and whenever you add. If not, click on the View -> Refresh or just press the F5 key on your keyboard to populate the list.)
编辑现有联系人:(Edit Existing Contact:)选择您需要编辑的联系人,然后单击选项->编辑联系人(快捷方式:按Ctrl + O),将显示添加联系人的相同表格.在这里更新您需要执行的任何操作,然后单击"保存"按钮以更新联系人.(Select the contact you need to edit and click Options -> Edit Contact (Shortcut: Press Ctrl + O) and the same form to add contact will be displayed. Here update whatever you need to and then click Save button to update the contact.)
删除联系人:(Delete Contact:)选择要删除的联系人,然后单击选项->删除联系人(快捷方式:按Delete键).它将确认是否删除.选择您的选择,以便执行操作.(Select the contact you want to delete and then click Options -> Delete Contact (Shortcut: Press Delete). It will confirm whether to delete or not. Select your choice so that the action will be performed.)
搜索联系人:(Searching for Contact:)要搜索联系人,请单击选项->查找人员,以便显示以下表格:(To search for a contact, click Options -> Find People so that the below form will be displayed:)

在上面的表格中,键入要搜索的一个或某些字段,然后单击立即查找.选中下面的复选框以显示具有任何符合条件的所有联系人.(In the above form, type one or some of the fields to search for and click Find now. Select the check box below to display all the contacts with matching criteria of any one.)
数据备份:(Data Backup:)查看下面提供的"备份数据"部分.(View the Backup Data section provided below.)
添加提醒:(Adding Reminders:)要添加提醒,请单击选项->提醒->添加事件.在"添加提醒"表单中,键入所需的详细信息.该提醒将显示在"联系人"表单本身中.通过选择查看->提醒可以显示或隐藏它.(To add Reminders, click Options -> Reminder -> Add Event. In the Add Reminder form, type the required details. The reminder will be displayed in Contacts form itself. It can be shown or hidden by selecting View -> Reminder.)
更改密码:(Change Password:)要更改当前用户的密码,请单击工具->更改密码,然后输入旧密码和新密码.要更改其他用户的密码,请单击工具->用户帐户,然后执行与第一步相同的操作.只有管理员帐户可以更改其他用户的密码.(To change the password of current user, click Tools -> Change Password and type in the old password and new password. To change the password of other users, click Tools -> User Account and do the same thing as you did in the first step. Only Administrator account can change the password of other users.)
更改设置:(Changing Settings:)要更改设置,请单击工具->设置.(To change the settings, click Tools -> Settings.)
备用联系人:(Backup Contacts:)这是一项从联系人列表中备份整个或选择性联系人的功能.单击选项->传输数据,以显示备份表单,如下表所示:(This is a functionality to backup entire or selective contacts from the list of your contacts. Click on Options -> Transfer Data so that backup form will be displayed as shown in the following form:)
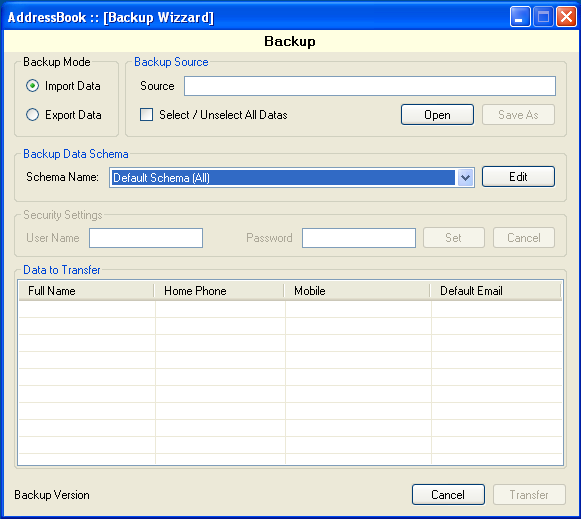 在上面的表格中,使用以下准则选择所需的详细信息.(In the above form, select the details required using the below guidelines.)
创建备份:(Create Backup:)要创建新的备份,请选择"备份模式"作为"导出数据",这将启用"另存为"按钮.单击另存为按钮,然后选择备份类型为XML(详细信息可见)还是COB备份(加密,受密码保护).然后选择架构,以选择可以将联系人的详细信息添加到备份中.要了解有关架构的更多信息,请阅读下面提供的"编辑架构"部分.(To create a new backup, select the Backup Mode as Export Data which enables Save As button. Click the Save As button and select the type of backup whether as XML (Details Visible) or COB Backup (Encrypted, Password Protected). Then Select the schema, to select which details of the contact can be added to the backup. To know more about schema, read the Edit Schema section provided below.)
如果您决定创建COB备份,则将启用"用户名"和"密码"字段.输入所需的用户名和密码,然后单击设置按钮.然后从列表中选择所有必须添加到备份中的联系人.现在您已经完成了,最后单击"传输"按钮以创建备份文件.(If you had decided to create a COB Backup, then the Username and Password fields will be enabled. Type in the required Username and Password and click the Set button. Then select all the contacts from the list which had to be added to the backup. Now that you are done, finally click on the Transfer button to create a backup file.)
从备份还原数据:(Restore Data from Backup:)要恢复备份,请选择"备份模式"作为"导入数据",这将启用"打开"按钮.单击打开按钮,然后从哪种类型的备份中还原数据,然后选择文件.如果您选择了COB Backup文件作为源文件,并且受密码保护,请输入用户名和密码,然后单击"设置"按钮.如果您的用户名和密码正确,则备份中的联系人将在网格中可见.选择您必须还原的所有联系人,然后单击转移按钮.现在您完成了.您的数据已恢复.(To restore the backup, select the Backup Mode as Import Data which enables Open button. Click the open button and select from which type of backup to restore data and then select the file. If you had selected COB Backup file as source file and if it is password protected, type in the user name and password and click the Set Button. If your User Name and Password are correct, the contacts in the backup will be visible in the grid. Select all the contacts which you have to restore and then click the transfer button. Now you are done. Your data has been restored.)
使用模式(Using Schemas)
仅在需要备份联系人的特定详细信息时使用架构.您可以使用为方便起见而提供的功能来创建,编辑和删除自己的模式.但是,您不能编辑或删除其他用户创建的架构或列表中已有的默认架构.要添加或编辑架构,请在上方显示的"备份向导"上,单击架构名称附近的"编辑"按钮,以使下面的表单可见:(Schemas are used when you need to backup only particular details of the contact. You can create, edit and delete your own schemas using the functionality provided for convenience. However you cannot edit or delete the schema created by other users or the default schema already in the list. To add or edit schema, click on the Edit button near the schema name on the Backup Wizard displayed above so that the below form will be visible:)
 上面的表格是模式编辑器.(The above form is the schema editor.)
添加新架构:(Add New Schema:)如果要从"模式名称"的下拉列表中创建新模式,请选择<创建新模式>,以便启用"保存"按钮.然后在第二个架构名称框中键入架构名称.左侧显示的列表包含用户可以输入的全部详细信息.只需选择要添加到备份中的详细信息,然后单击->按钮将其添加到右侧的列表中,该列表即为要添加的详细信息.我认为我不需要解释通常在大多数应用程序中使用的其他四个按钮.最后,单击保存按钮以保存架构.现在,您可以从"备份向导"中的架构列表中选择您的架构.(If you want to create a new schema from the drop down list of Schema Name, select < Create New Schema > so that Save button will be enabled. Then type the schema name in the second schema name box. The list shown on the left side contains the total details which can be entered by the user. Just select the details you want to add to the backup and click the -> button to add it to the list at the right side which is the list of details to be added. I think I need not explain the other four buttons which is usually in most of the applications. Finally click on the save button to save the schema. Now you can select your schema from the list of the schemas in Backup Wizard.)
编辑现有架构:(Edit Existing Schema:)要编辑架构,请从列表中选择要编辑的架构,以便启用"编辑"按钮.进行必要的更改,然后单击"保存"按钮.请注意,编辑架构会使使用该架构创建的备份不可用(但是您可以更改架构的名称).(To edit the schema, select the schema from the list which you had to edit so that Edit button will be enabled. Make the necessary changes and click Save button. Note, editing the schema makes the backup created using the schema unusable (However you may change the name of the schema).)
删除架构:(Delete Schema:)从列表中选择架构,然后单击"删除"按钮,以便将架构删除.(Select the schema from the list and click Remove button so that the schema will be removed.)
杂项功能(Miscellaneous Functions)
分享联系人:(Share Contact:)要共享现有联系人,请选择该联系人并右键单击->操作->共享联系人.(To Share an existing contact, select the contact and Right Click -> Actions -> Share Contact.)
取消共享联系人:(UnShare Contact:)要取消共享共享联系人,请在共享联系人列表中选择查看它,然后右键单击->操作->取消共享联系人.(To unshare a shared contact, select view it in a shared contact list and Right Click -> Actions -> Unshare Contact.)
在类别之间移动联系人:(Move Contact between Categories:)只需从列表中选择联系人,右键单击,然后从菜单中单击剪切.然后转到左侧面板,选择必须将其移动到的类别,右键单击,然后从菜单中单击粘贴.(Just select the contact(s) from the list, right click and then click Cut from the menu. Then go to left panel, select the category to which it had to be moved, right click and then click paste from the menu.)
致电:(Calling:)要通过拨号调制解调器拨打电话号码,请选择联系人,右键单击->操作->通话.将打开一个新表格以选择电话号码和呼叫.几个月前从未知位置从网上下载DLL可以免费添加此功能.感谢公司或作者上传免费DLL((To make a call to a phone number through your dialup modem, select the contact, Right Click -> Actions -> Call. A new form will be opened to select the phone number and call. This functionality is added by downloading a DLL from the net from unknown location few months ago which is free to use. I thank the company or the author whoever had uploaded the free DLL ()Ras.dll(Ras.dll)).().)
印刷联系人:(Printing Contact:)要打印联系人,请单击选项->打印联系人,然后将显示下图:(To print the contacts, click Options -> Print Contacts and then the below figure will be displayed:)
 在上图中,选择列出的所有联系人,然后选择需要执行的打印类型,即表格格式(水平)和生物数据格式(垂直)(带或不带边框线).然后选择要打印的详细信息的架构.仅打印模式中列出的列.然后单击左上角的保存按钮,然后将打印文件另存为网页.然后打开保存的文件,该文件将在您的默认浏览器中打开,然后您可以调整布局并可以从浏览器进行打印.(In the preceding figure, select all the contacts listed and then select the type of print you need to perform namely in tabular format (Horizontal) and Bio-Data format (Vertical) with or without border lines. Then select the schema for the details to be printed. Only the columns listed in the schema will be printed. Then click the save button at the top left corner and then save the print file as webpage. Then open the file saved which will open in your default browser and then you can adjust the layout and you can print from the browser.)
兴趣点(Points of Interest)
您可以使用任何数据库(例如Microsoft SQL Server,Microsoft Access或MySql)作为联系人的存储区域,以免您陷入单一数据库的困境.(You can use any database like Microsoft SQL Server, Microsoft Access or MySql as the storage area for your contacts, so that you are not stuck with your single database.)
此应用程序为每个用户维护一个单独的数据列表,以便其他用户无法访问您的联系人.如果用户具有管理权限,则他可以访问其他联系人,但不能编辑或删除它们.(This application maintains a separate list of data for each user so that your contacts cannot be accessed by other users. If the user has Administrative rights, he can access others contacts but he cannot Edit or Delete them.)
如果您需要其他用户查看一个或某些联系人,则只能共享那些联系人,以便其他用户可以在共享联系人下查看它.(If you need other users to view one or some of your contacts, you can share only those contacts and so other users can view it under shared contacts.)
您可以根据需要将联系人分组到您创建的许多嵌套类别下,以便可以高效地使用它.(You can group contacts according to your requirements under many nested categories created by you so that you can use it efficiently.)
您可以从连接到数据库的任何系统访问数据,该系统包含本地网络中的联系人.(You can access the data from any system connected to the database which contains the contacts from your local network.)
将联系人添加到一个类别后,您可以轻松地将联系人剪切并粘贴到另一类别.(After adding the contacts to one category, you can cut and paste the contact to another category easily.)
您可以通过两种不同的方式来创建联系人的备份,一种是XML文件,另一种是通讯簿备份文件((You may create a backup of your contacts in two different ways, one as XML file and another as Address Book Backup file ()*** .CBK(**.CBK*)**).使用通讯簿备份文件,您的详细信息被加密并受密码保护.(*). Using Address Book Backup file, your details are encrypted and are password protected.*)
备份时,您可以选择要将哪些联系人添加到备份中.(While backing up, you can select which contacts are to be added to the backup.)
您可以将应用程序和单个Microsoft Access DB随身携带在pendrive中,以便可以在任何地方查看联系人.(You can carry the application and single Microsoft Access DB in pendrive as portable so you can view your contacts anywhere.)
您可以使用架构将联系人的相关详细信息仅添加到备份中.这些架构只能由创建它的用户和管理员来编辑或删除.(You can use schemas to add only relevant details of the contact to your backup. These schemas can be edited or deleted only by the user who created it and by the Administrator.)
从用户帐户中删除用户后,建议进行完整备份(使用当前(已删除用户)登录用户名和密码),以便在知道登录用户名和密码后将联系人还原到任何其他现有用户帐户或新帐户.(When a user is removed from the User Account, it is suggested to take a complete Backup (with current (removed user) login User Name and Password) so that the contacts can be restored on knowing the login User Name and Password to any other existing account or new account.)
未来更新(Future Updates)
可移植性:(Portability:)现在,如果您携带应用程序,则该应用程序仍然可以像在本地系统上运行一样运行,但是将来,该应用程序可以识别出它是可移植的,因此可以找到更多的优势.而且,如果您已为该应用程序使用了自动运行功能,则该应用程序将保护您的pendrive免遭未经您同意而复制病毒.(Now if you carry your application, the application still works as if it is running from your local system, but in future the application can recognise that it is running as portable and so can find some more advantages. And also if you had used autorun for the application, this application will protect your pendrive from copying viruses without your consent.)
提醒事件:(Reminding Events:)现在,应用程序仅可以存储提醒,您可以将其查看为文本,但是将来您会在指定时间之前被提醒事件.(Now the application can store just the reminder and you can view it as text, but in future you will be reminded of the events before the time specified.)
Windows Vista主题:(Windows Vista Theme:)现在,该应用程序从您的系统继承了主题,但是将来,Enhanced Vista会寻找具有不同主题的该应用程序,并附带一个主题编辑器,以为应用程序生成您自己的主题.(Now the application inherits the theme from your system but in future, Enhanced Vista looks for this application with different offered theme and also with a theme editor attached with it to generate your own theme for the application will be provided.)
支持多种语言:(Support Multiple Languages:)现在,该应用程序只能使用英语,并且将来会支持多种语言,还可以使用编辑器来添加您自己的语言.(Now the application can use only English and will support multiple languages in future and an editor to add your own languages.)
备份为数据库:(Backup as Database:)现在,您可以将备份作为受密码保护,但是不能直接修改.但是将来您可以双击打开备份,输入用户名和密码,然后使用通讯簿对其进行编辑,就好像您正在使用某些数据库一样.(Now you can take the backup as password protected but cannot modify it directly. But in future you can open the backup just by double click, enter user name and password and edit it with Address Book as if you were using some of the databases.)
添加新联系人:(Adding New Contacts:)现在,该应用程序包含用于添加"新联系人"的表单,该表单与Windows通讯簿的外观相似.将来,它将被更高效,更实用的形式取代.(Now the application contains the form for adding New Contact which looks similar for Windows Address Book. In future, it will be replaced with a more efficient and more functional form.)
系统保护:(System Protection:)通过保护注册表免受恶意软件的侵害,防止其修改注册表,从而为系统提供了非常低级的保护.大多数病毒仅由于注册表的运行条目而开始执行,因此将对其进行监视,并且如果您愿意这样做,条目将被阻止.(Very low level protection for your system by protecting your registry from malwares from modifying the registry. Most of the viruses starts execution just because of the run entry of your registry and so it will be monitored and the entries will be blocked if you prefer to do so.)
讯息:(Messaging:)将提供消息传递功能,以使用该应用程序从局域网内的不同系统向其他用户发送消息.它还提供了从系统直接将小文件发送到其他系统的功能(传输时耗费大文件).(Messaging functionality will be provided to send message to another users using the application from different system within the LAN. It also provides the functionality of sending small files to other systems directly (time consuming for large files while transferring) from your system.)
聊天:(Chatting:)仅通过使用系统的外部IP地址请求他们与该应用程序的其他用户进行直接聊天(由于大多数情况下聊天不成功,因此未确认此功能,并且通过修改应用程序增加了安全风险).(Direct chatting with other users of this application throughout the world just by requesting them for chat using the external IP address of their system (Not confirmed for this functionality because of unsuccessful chats most of the times and raising security risk by modifing the application).)
打印联系人:(Printing Contacts:)现在,仅以低效率的功能提供打印.但将来,它将具有多种打印布局,并将在应用程序中提供.(Now printing is provided just with a low and inefficient functionality. But in future, it will have multiple layout for printing and will be provided within the application.)
错误报告(Bug Reporting)
此应用程序尚未经过大量测试,因此可能会或可能不会包含错误.如果有任何错误,并且如果您有超出上述规范的建议来改进项目,请随时与我联系(This application has not been tested much and so may or may not contain bugs. In case of any bugs, and if you have suggestions to improve the project more than the above specification, feel free to contact me at)shridhar_tl@ymail.com(shridhar_tl@ymail.com).如果您报告任何错误,该应用程序将尽快更新,并且将通过邮件通知您更新.(. If you report any bugs, the application will be updated as soon as possible and you will be notified by mail for the updates.)
历史(History)
在2008年,该应用程序首次以最小的功能上传到了互联网.但是现在,它已进行了更新,并增加了一些新的增强功能,例如直接从联系人列表拨打电话,将数据分组在嵌套类别下以提高效率,以及仅与其他用户共享相关联系人.(In 2008, this application had been first uploaded to the internet with minimal functionality. But now, it has been updated with some new and enhanced functionality like Making a Call directly from the contact list, Grouping the data under nested Categories for better efficiency, and sharing only relevant contacts with other users.)
许可
本文以及所有相关的源代码和文件均已获得The Code Project Open License (CPOL)的许可。
C#3.0 C# SQL C#2.0 Win2K WinXP .NET2.0 VS2008 Win32 VS2005 新闻 翻译