如何制作迷你Minecraft游戏(译文)
By robot-v1.0
本文链接 https://www.kyfws.com/games/how-to-make-a-mini-minecraft-game-zh/
版权声明 本博客所有文章除特别声明外,均采用 BY-NC-SA 许可协议。转载请注明出处!
- 12 分钟阅读 - 5790 个词 阅读量 0如何制作迷你Minecraft游戏(译文)
原文地址:https://www.codeproject.com/Articles/1095067/How-to-Make-a-Mini-Minecraft-Game
原文作者:Vahe Karamian
译文由本站 robot-v1.0 翻译
前言
Programming in itself is no small task. Graphics programming complicate things a tab-bit more!
编程本身并不是一件容易的事.图形编程使事情变得更加复杂!
介绍(Introduction)
自从我上一篇关于CodeProject的文章以来已经有一段时间了.最近,我决定写一篇新文章,希望有人能对它有所帮助.(It has been a while since my last article here on CodeProject. Recently, I decided to do a new article and hopefully someone can find it useful.)
在本文中,您将看到如何创建一个应用程序,该应用程序将允许您构建类似于Minecraft的世界.当然,我们不会构建整个应用程序,但是我会给您足够的汁液来推动您的发展,并且您可以在此基础上构建.(In this article, you will see how you can create an application that will allow you to build a world similar to Minecraft. Of course, we are not going to build the whole application, but I will give you enough juice to get the ball rolling and that you can built on top of.)
基本上,我们将创建一个虚拟环境,用户可以在其中使用多维数据集构建内容!真的就是这么简单.与孩子在现实世界中使用积木创建有趣结构的方式非常相似,您将能够在虚拟世界中这样做.(Basically, we are going to create a virtual environment where users can build stuff using cubes! It is really as simple as that. Very similar to how kids use blocks in the real-world to create fun structures, you will be able to do so in a virtual world.)
上图应该使您对我们在此要实现的目标有所了解.(The figure above should give you an idea of what we are trying to achieve here.)
背景(Background)
当我在考虑一个低年级计算机图形学课程的项目时,想到这个项目的想法就出现了.编程是一个相对简单的想法/概念,对学生来说是一个很好的动手编程练习.(The idea of coming up with this project came to me while I was thinking about a project for a lower division computer graphics course. It is a relatively simple idea/concept to program and a good hands-on programming exercise for the students.) 您将需要熟悉Unity游戏引擎和C#语言.我不会介绍任何一个的基础知识!如果您从未使用过或听说过Unity,那么我有一个(You will need to be familiar with the Unity Game Engine and the C# language. I will not be covering the basics of either one! If you have never used or heard of Unity, I have a)10部分文章系列(10 Part Article Series)涵盖了基础知识,这是指向的链接(that cover the basics, here is the link to) 第1部分(Part 1) .我建议你从那里开始!(. I suggest you start over there!) 您将在本文中学习的概念和主题:(Concepts and or Topics that you will learn in this article:)
- 游戏对象(GameObjects)
- 预制件(Prefabs)
- 纹理和材质(Textures and Materials)
- 法线向量(Normal Vectors)
- 基本用户界面(Basic User Interface)
- 灯和相机(Lights and Camera)
使用代码(Using the Code)
在开始之前,您将需要获得Unity.您可以从下载(Before we start, you will need to get Unity. You can download it from) www.unity3d.com(www.unity3d.com) .(.) 您可以同时获得Windows和Mac操作系统的安装程序.本文中的所有内容都将适用于两个平台.主要区别在于键盘访问快捷键,除此之外,其他所有功能都应相同.(You can get the installer for both Windows and Mac operating systems. Everything in this article will be applicable to both platforms. The main difference would be the keyboard access shortcuts, other than that, everything else should be the same.) Unity包:(Unity Package:) 码(code)
这个概念(The Concept)
现在我们已经掌握了基本的知识,我们可以开始讨论我们想要实现的目标以及如何实现它.至少,一种解决方法.以下是我们需要考虑的一些事项:(Now that we have the basic stuff out of the way, we can start discussing what we want to achieve and how to go about it. At least, one way of going about it. Here are some of the items we need to think about:)
- 使用鼠标放置对象(Placing Objects using the mouse)
- 更改对象的纹理/材质(Changing the Texture/Material of the Object)
- 能够移动相机,以便我们可以从不同角度观看环境(Ability to move the camera so we can view the environment from different angles) 似乎很容易.让我们看一下如何开始实施它们.(Seems pretty easy. Let’s take a look at see how we can start implementing them.)
代表方块(Representing the Blocks)
我们需要以某种方式表示我们想要放置在世界中或与之交互的对象.为此,我们需要为要表示的对象创建一个几何模型,并为其提供一些材料,以表示将应用于该几何的颜色或纹理.(We need to somehow represent the objects we want to place in the world and or interact with. For this to happen, we need to create a geometric model of the object that we want to represent, as well as give it some material, to represent the color or texture we will apply to the geometry.)
我们将使用单位多维数据集作为模型.它是表示和使用的最简单的3D形状之一.(We will use a Unit Cube as our model. It is one of the simplest 3D shapes to represent and work with.)
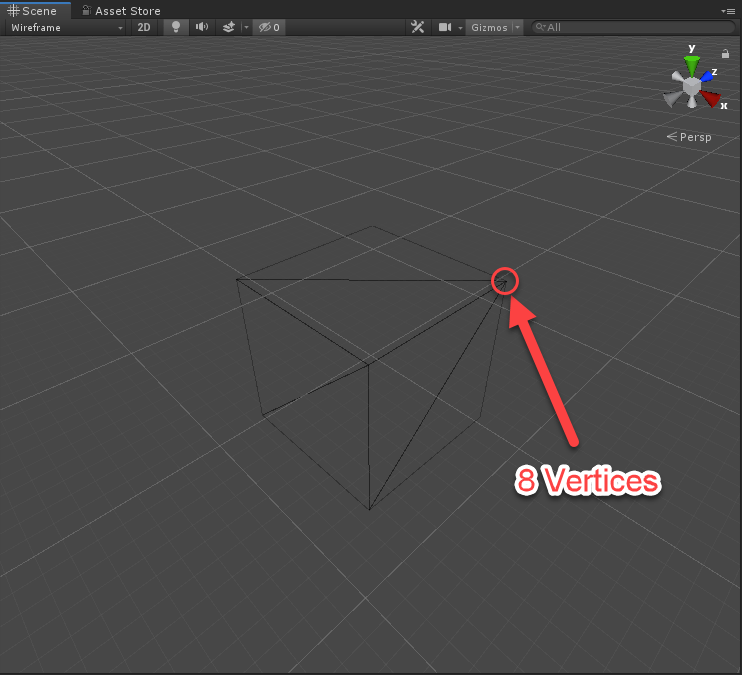
立方体由8个顶点,6个面和12个三角形组成.(A cube is composed of 8 vertices, 6 faces and 12 triangles.) 这是一个很好的链接(Here is a great link) 降低术语的基础.(to get the basics of the terminology down.)
为了成功表示我们的多维数据集,我们需要所谓的网格过滤器.几何结构以及每个顶点与边,边和面之间的所有关系都存储在此处.从技术上讲,它具有一些更重要的数据,我们将在以后查看.(In order to successfully represent our cube, we need what is called a Mesh Filter. The geometry and all of the relationships between each vertex and edge, edge and face are stored in here. Technically, it has some more important data that we will be looking at later on.)
我们还需要一种将立方体放置在3D世界中的方法.(We also need a way to position our cube in the 3D world.)
场景中的每个对象都是(Each object in a scene is a) GameObject .无论它们代表什么,型号,灯光,照相机等,它们都是(. Regardless of what they represent, models, lights, cameras, etc., they are) GameObjects .每(. Each) GameObject 具有变换组件,该组件对于GO在3D世界中的放置非常重要.的(has a Transform Component that is very important in the placement of the GO in the 3D world. The) Transform 组件包含三个向量,每个向量表示以下各项:(component contains three Vectors that are each a representation of the following:)
PositionRotationScale接下来,我们需要一种为立方体着色的方法.这是通过"网格渲染器"和与多维数据集关联的材质完成的.在Unity中创建多维数据集原语时,它会配置(Next, we need a way to color the cube. This is done through the Mesh Renderer and the Material that is associated with the cube. When you create a cube primitive in Unity, it configures the)GameObject基本的组件将使其呈现为多维数据集.(with the basic components that will allow it to render as cube.) 您应该知道的最后一个组件是对撞机.引擎使用它来检测碰撞.您将看到我们稍后将如何使用它.(There is one last component that you should be aware of, and that is the Collider. This is used by the engine to detect collisions. You will see how we will be using this later on.)
创建预制件并应用默认材料(Creating a Prefab and Applying Default Material)
现在,您已经对(Now that you have a basic understanding of a) GameObject .我们将需要一个可用于在运行时实例化块位置的Prefab.最好的显示方法是通过一些屏幕截图.(. We will need a Prefab that can be used to instantiate at runtime for the placement of our blocks. The best way to show this is through some screenshots.)
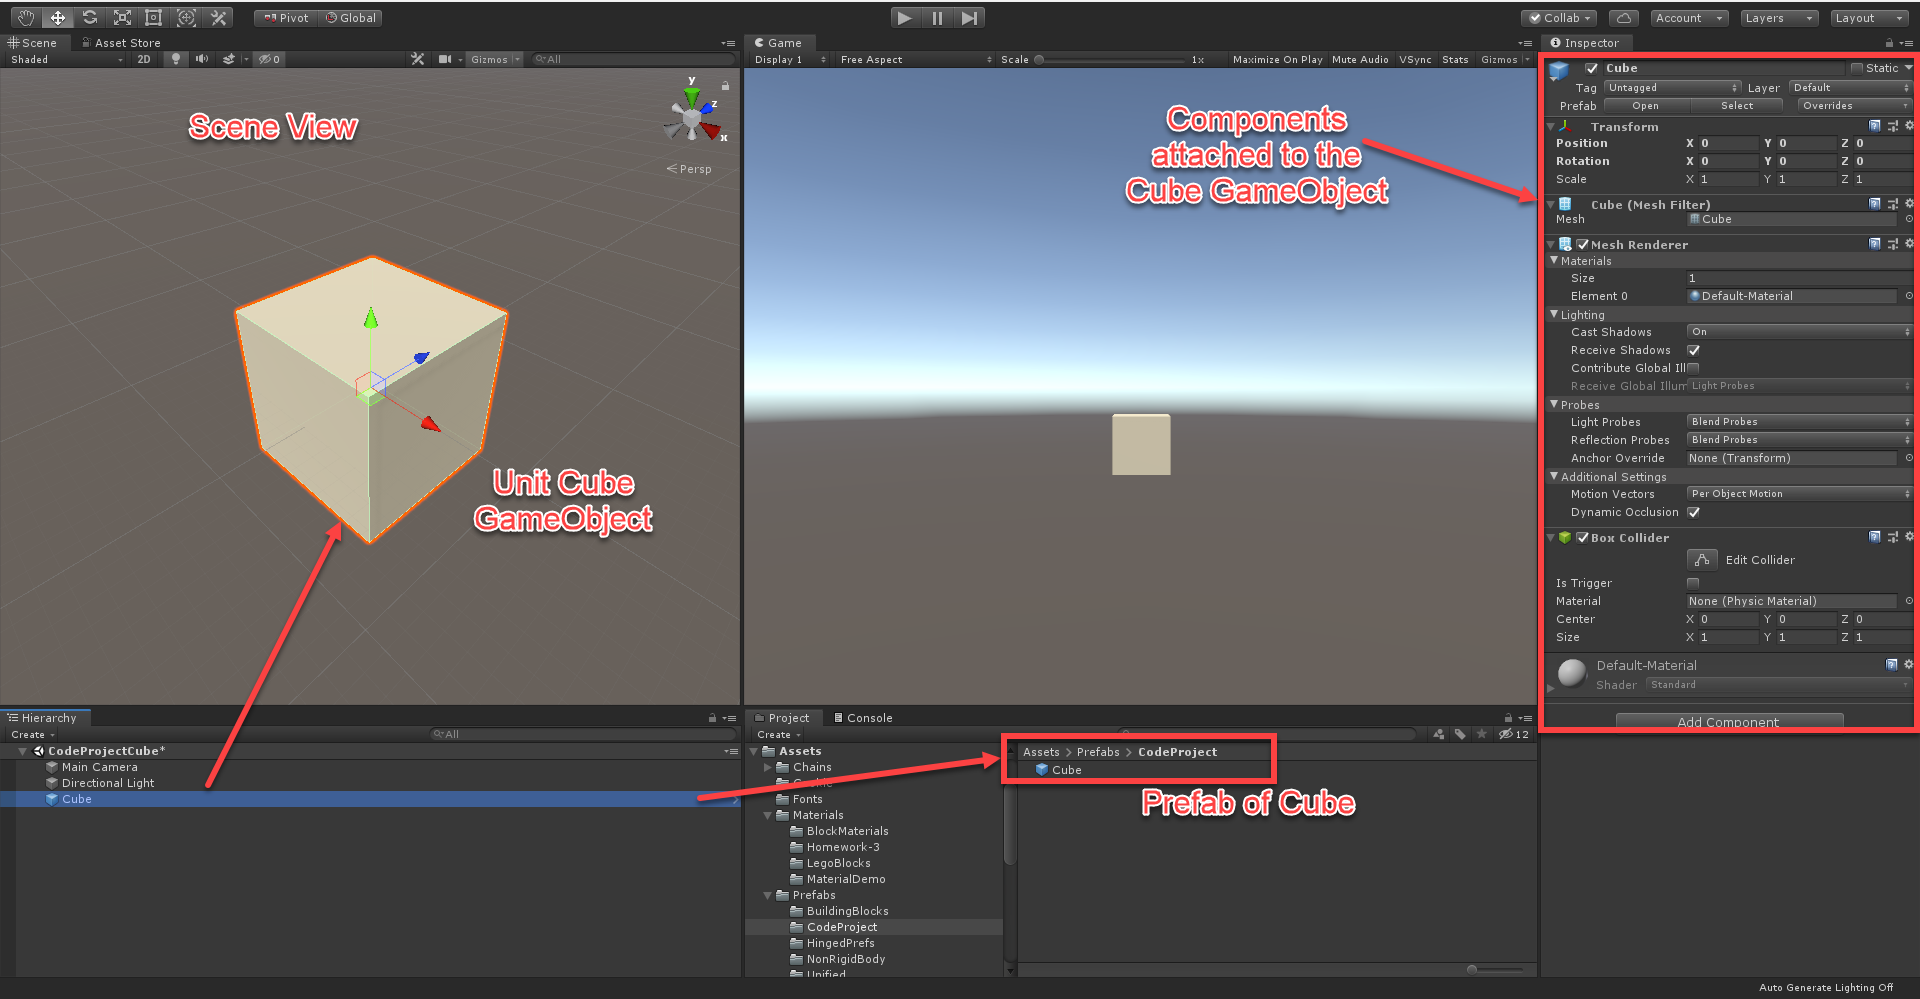
在上图中,您将看到Unity IDE.您应该关注的主要事情是创建预制件.为了创建一个预制件,您只需选择(In the figure above, you will see the Unity IDE. The main things you should be concerned with is the creation of a Prefab. In order to create a Prefab, you simply select the) GameObject 代表(that is representing the) Cube 从"层次结构"窗口中,并将其拖到您下面的"项目"窗口中(from the Hierarchy Window, and dragging it over to the Projects Window under your)**资产(Asset)**夹.预制件基本上是您的已保存实例(folder. A Prefab is a basically a saved instance of your) GameObject 在那个特定的时间.我们将使用此Prefab来动态生成要放置到世界中的块.(at that particular time. We will be using this Prefab to dynamically generate the blocks that we want to place into our world.)
如果您花时间查看上图的高分辨率,您将直观地看到如何显示我们所讨论的每个组件.(If you take the time and look at the high-resolution of the figure above, you will visually see how each one of the components we have discussed are shown.)
注意(NOTE):我鼓励您花时间阅读(: I encourage you to take the time and read the) 10部分系列文章(10 Part Series Articles) 如果您没有Unity经验.(if you have no Unity experience.)
纹理和材质(Textures and Materials)
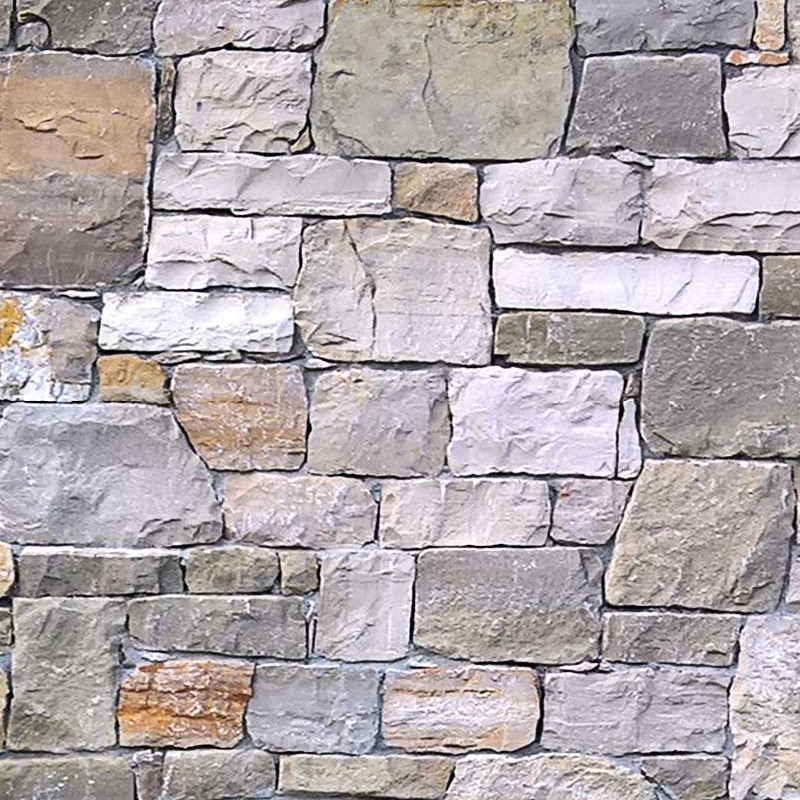
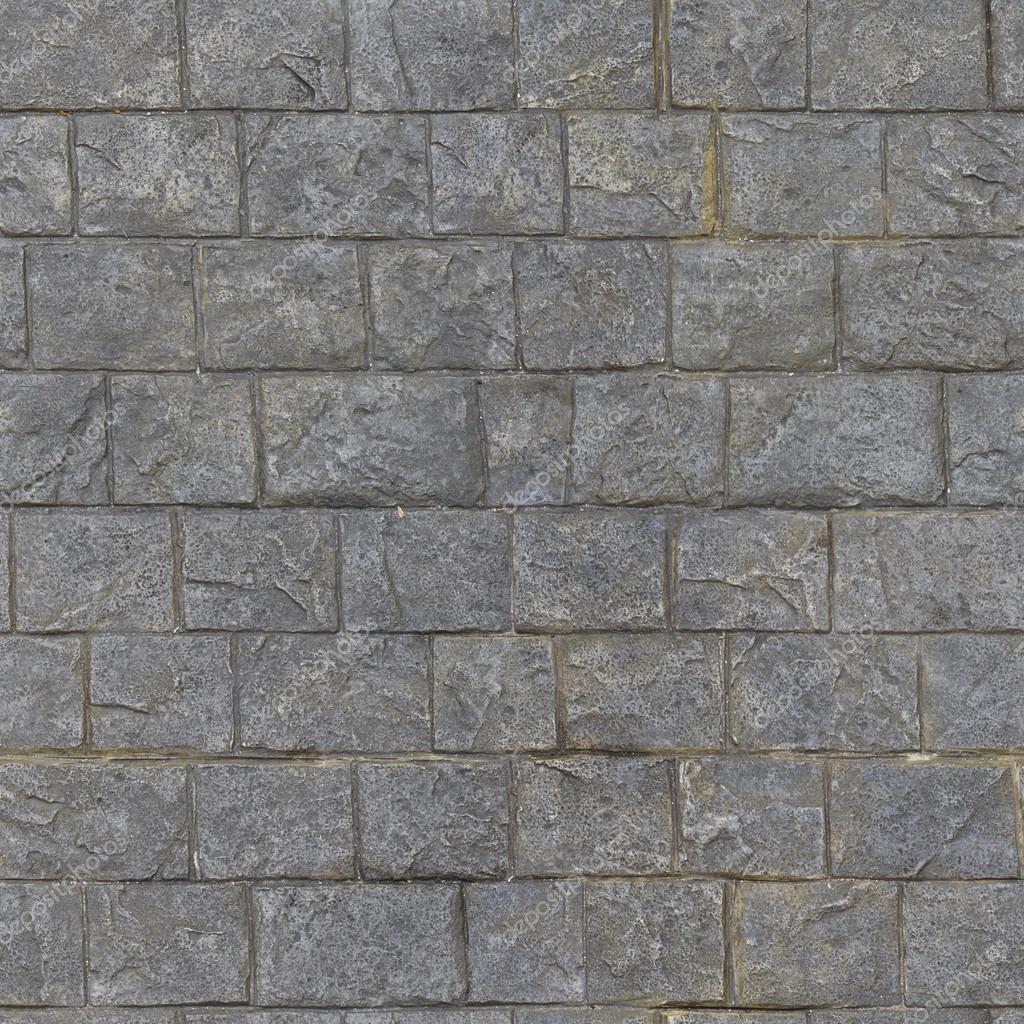
为了简单起见,我们将使用三种在实例化期间可以应用于多维数据集的纹理/材质.这些可以是任何纹理.出于演示目的,我将使用以下三种:(For simplicity, we are going to use three textures/materials that can be applied to the cube during instantiation. These could be any textures. For demonstration purposes, I will be using the following three:)
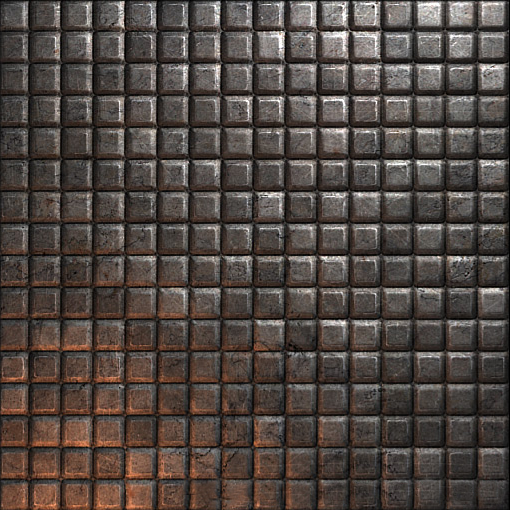
您可以简单地下载这些纹理,也可以使用自己的纹理创建三种独特的材料.要创建材料,您需要在"项目"窗口中右键单击,然后从弹出窗口中选择"创建材料".为材质资产指定一个唯一的名称,然后将纹理与(You can simply download these textures, or use your own to create three unique materials. To create a material, you will need to right-click in the Projects Window and from the Pop-up Window select Create Material. Give the material asset a unique name, and associate a texture with the Texture attribute of the) Albeido 属性.(property.)
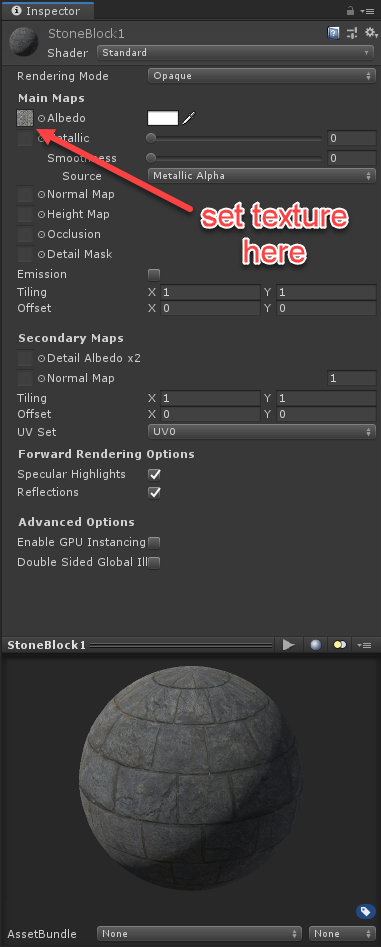
您将需要对每种纹理/材质执行此步骤.(You will need to perform this step for each texture/material.)
游戏/应用逻辑(Game / App Logic)
现在您已经有了基本设置,是时候开始做有趣的部分了!我们需要创建一些C#代码以将所有内容组合在一起.(Now that you have the basics setup, it is time to start doing the fun part! We need to create some C# code to put everything together.)
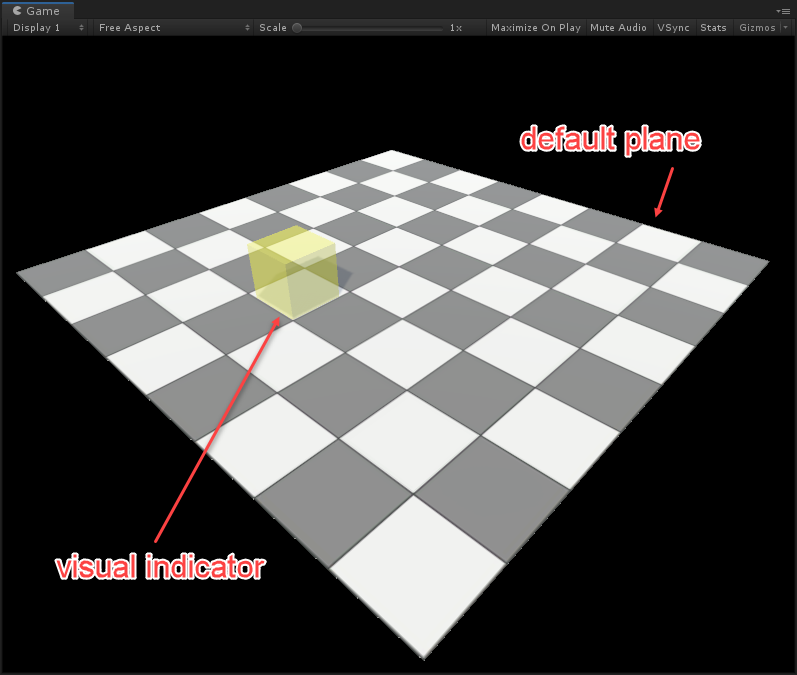
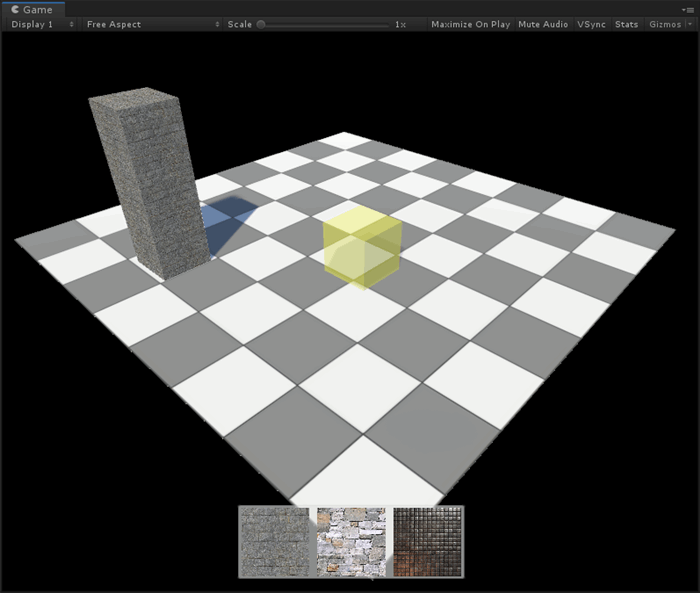
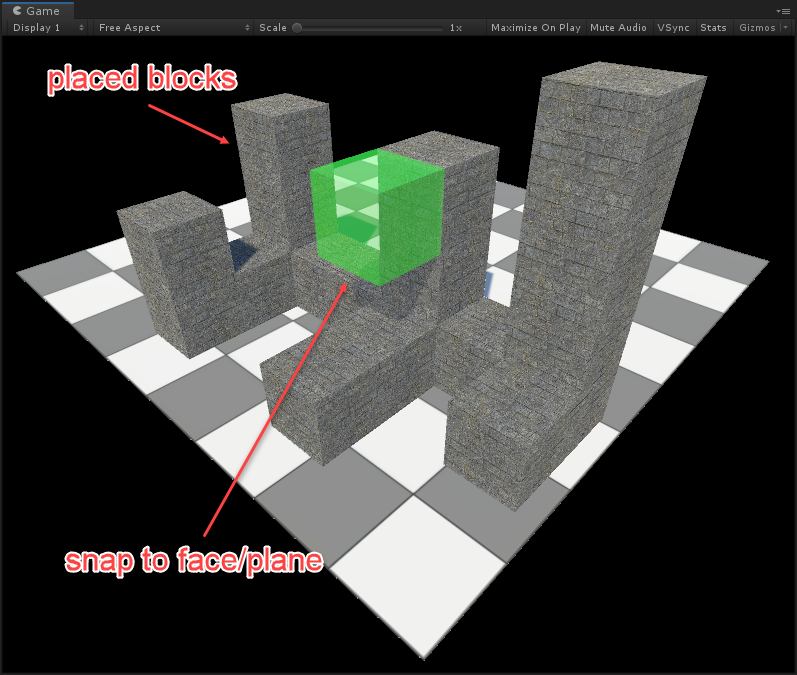
首先,我们需要有一个地板或一个底座.这将用于放置我们的初始块,并且有点像开始构建块的平台.我在图中在此处说明的地板位于<0,0,0>且比例尺为<10,0.1,10>.透明的黄色块是一个可视指示器,可循环显示给用户,并根据鼠标位置告诉他或她将块放置在何处.我还应用了未提供的棋盘格纹理.(To start out, we would need to have a floor or a base. This will be used to place our initial blocks and it will be kind of like the platform to start building our blocks. The floor I have illustrated here in the figure is positioned at <0,0,0> and has a scale of <10,0.1,10>. The transparent yellow block is a visual indicator that loops back to the user and tells him or her where the block will be placed based on the mouse position. I have also applied a checker texture which has not been provided.) 这是使您能够执行上图中所见内容的代码:(Here is the code that will enable you to perform what you see in the figure above:)
    bool realTimeHit =
        Physics.Raycast(Camera.main.ScreenPointToRay(Input.mousePosition),
                        out realTimeHitInfo);
    if (realTimeHit)
    {
        {
            if (realtimeCube == null)
            {
                realtimeCube = GameObject.CreatePrimitive(PrimitiveType.Cube);
                realtimeCube.name = "TempCube";
                realtimeCube.layer = 2;
                realtimeCube.AddComponent<Rigidbody>().useGravity = false;
                realtimeCube.AddComponent<BlockCollision>();
                realtimeCube.GetComponent<Renderer>().material =
                    transparentMaterial;
                realtimeCube.GetComponent<Renderer>().material.color =
                    new Color(1, 1, 0, 0.5f);
                realtimeCube.transform.position =
                    new Vector3(realTimeHitInfo.point.x,
                                realTimeHitInfo.point.y + (0.5f),
                                realTimeHitInfo.point.z);
            }
            else
            {
                // check to see if we
                if(realTimeHitInfo.transform.tag.Equals("Base"))
                {
                    realtimeCube.GetComponent<Renderer>().material.color =
                        new Color(1, 1, 0, 0.5f);

                    realtimeCube.transform.position =
                        Vector3.Lerp(realtimeCube.transform.position,
                                     new Vector3(realTimeHitInfo.point.x,
                                     realTimeHitInfo.point.y + (0.5f),
                                     realTimeHitInfo.point.z),
                                     Time.deltaTime * 10);

                }
                else
                {
                    realtimeCube.GetComponent<Renderer>().material.color =
                        new Color(0, 1, 0, 0.5f);

                    if (realTimeHitInfo.normal == new Vector3(0, 0, 1))
                    {
                        realtimeCube.transform.position =
                            new Vector3(realTimeHitInfo.transform.position.x,
                                        realTimeHitInfo.transform.position.y,
                                        realTimeHitInfo.point.z + (0.5f));
                    }
                    if (realTimeHitInfo.normal == new Vector3(1, 0, 0))
                    {
                        realtimeCube.transform.position =
                            new Vector3(realTimeHitInfo.point.x + (0.5f),
                                        realTimeHitInfo.transform.position.y,
                                        realTimeHitInfo.transform.position.z);
                    }
                    if (realTimeHitInfo.normal == new Vector3(0, 1, 0))
                    {
                        realtimeCube.transform.position =
                            new Vector3(realTimeHitInfo.transform.position.x,
                                        realTimeHitInfo.point.y + (0.5f),
                                        realTimeHitInfo.transform.position.z);
                    }
                    if (realTimeHitInfo.normal == new Vector3(0, 0, -1))
                    {
                        realtimeCube.transform.position =
                            new Vector3(realTimeHitInfo.transform.position.x,
                                        realTimeHitInfo.transform.position.y,
                                        realTimeHitInfo.point.z - (0.5f));
                    }
                    if (realTimeHitInfo.normal == new Vector3(-1, 0, 0))
                    {
                        realtimeCube.transform.position =
                            new Vector3(realTimeHitInfo.point.x - (0.5f),
                                        realTimeHitInfo.transform.position.y,
                                        realTimeHitInfo.transform.position.z);
                    }
                    if (realTimeHitInfo.normal == new Vector3(0, -1, 0))
                    {
                        realtimeCube.transform.position =
                            new Vector3(realTimeHitInfo.transform.position.x,
                                        realTimeHitInfo.point.y - (0.5f),
                                        realTimeHitInfo.transform.position.z);
                    }
                }
            }
        }
    }
    else
    {
        if (realtimeCube)
            Destroy(realtimeCube);
    }
}
else
{
    if (realtimeCube)
        Destroy(realtimeCube);
}
上面的代码似乎令人困惑,但是请相信我,大多数复杂性都是在后台处理的!让我们细分并再次理解该概念,然后查看将两者联系起来的代码.(The code above might seem confusing, but trust me, most of the complexity is being handled under the hood! Let’s breakdown and understand again the concept and then look at the code to connect the two.) 我们需要做的第一件事是从屏幕空间获取鼠标位置并将其转换为2D坐标,然后将其转换为3D的世界空间.接下来,我们需要创建一条光线,该光线将从新计算的3D坐标生成,并将其投射到给定距离的世界中.这是通过所谓的Raycasting完成的:(The first thing we need to do is take the mouse position from screen-space and convert that 2D coordinate and convert it into world-space which is in 3D. Next, we need to create a ray that will be generated from the newly computed 3D coordinate and cast it into the world at a given distance. This is done by what’s called Raycasting:)
Physics.Raycast(Camera.main.ScreenPointToRay(Input.mousePosition), out realTimeHitInfo);
此函数使用物理引擎生成从空间中的点到空间中的另一点的射线,并将收集到的数据存储在类型为的对象中(This function uses the physics engine to generate a ray from a point in space to another point in space, and it stores the data that it collects in an object of type) RaycastHit 作为一个(as an) out 参数,即(parameter, i.e.,) realTimeHitInfo .实际函数返回一个布尔变量,该变量指示光线投射是否与世界上的任何物体发生碰撞,此布尔值存储在(. The actual function returns a boolean variable indicating if the raycast collided with anything in the world, this boolean value is stored in) realTimeHit 变量.(variable.)
如果碰巧是这样,则我们提取检测到/与之碰撞的对象,并将其存储在(If this happens to be true, we then extract the object we detected/collided with that have been stored in) realTimeHitInfo 变量.接下来要做的是确定是否实例化了临时多维数据集,否则,我们继续实例化多维数据集原语并分配基本属性.(variable. The next thing we do is determine if we have our temporary cube instantiated, if not, we go ahead and instantiate the cube primitive and assign the basic properties.)
if (realtimeCube == null)
{
    realtimeCube = Instantiate(buildingBlockPref);
    realtimeCube.name = "TempCube";
    realtimeCube.layer = LayerMask.NameToLayer("RealTime");
    realtimeCube.AddComponent<BlockCollision>();
    realtimeCube.GetComponent<Renderer>().material = transparentMaterial;
    realtimeCube.GetComponent<Renderer>().material.color = new Color(1, 1f, 0, 0.5f);
    realtimeCube.transform.position =
        new Vector3(realTimeHitInfo.point.x,
                    realTimeHitInfo.point.y + (0.5f),
                    realTimeHitInfo.point.z);
}
的(The) else 子句将使用鼠标指针并将透明多维数据集移动到新位置.如果您恰好指向基座,它将放置在我们与基座碰撞的指定位置.如果碰巧与现有块碰撞,则需要确定要与之碰撞的面/面.这可以通过计算或获取法向矢量来完成,该法向矢量将确定您要与哪张脸碰撞.使用此信息,您将调整块的位置以相应地卡在面上.(clause will use the mouse pointer and move the transparent cube to the new position. If you happen to be pointing on the base, it will place it at the specified position where we are coliding with the base. If you happen to be colliding with an existing block, you will need to determine face/side you are colliding with. This is done by calculating or getting the Normal Vector which will determine which face you are colliding with. Using this information, you will adjust the placement of your block to snap on the face accordingly.)
else
{
    realtimeCube.GetComponent<Renderer>().material.color = new Color(0, 1, 0, 0.5f);
    if (realTimeHitInfo.normal == new Vector3(0, 0, 1))
    {
        realtimeCube.transform.position =
            new Vector3(realTimeHitInfo.transform.position.x,
                        realTimeHitInfo.transform.position.y,
                        realTimeHitInfo.point.z + (0.5f));
    }
    if (realTimeHitInfo.normal == new Vector3(1, 0, 0))
    {
        realtimeCube.transform.position =
            new Vector3(realTimeHitInfo.point.x + (0.5f),
                        realTimeHitInfo.transform.position.y,
                        realTimeHitInfo.transform.position.z);
    }
    if (realTimeHitInfo.normal == new Vector3(0, 1, 0))
    {
        realtimeCube.transform.position =
            new Vector3(realTimeHitInfo.transform.position.x,
                        realTimeHitInfo.point.y + (0.5f),
                        realTimeHitInfo.transform.position.z);
    }
    if (realTimeHitInfo.normal == new Vector3(0, 0, -1))
    {
        realtimeCube.transform.position =
            new Vector3(realTimeHitInfo.transform.position.x,
                        realTimeHitInfo.transform.position.y,
                        realTimeHitInfo.point.z - (0.5f));
    }
    if (realTimeHitInfo.normal == new Vector3(-1, 0, 0))
    {
        realtimeCube.transform.position =
            new Vector3(realTimeHitInfo.point.x - (0.5f),
                        realTimeHitInfo.transform.position.y,
                        realTimeHitInfo.transform.position.z);
    }
    if (realTimeHitInfo.normal == new Vector3(0, -1, 0))
    {
        realtimeCube.transform.position =
            new Vector3(realTimeHitInfo.transform.position.x,
                        realTimeHitInfo.point.y - (0.5f),
                        realTimeHitInfo.transform.position.z);
    }
}
上面代码中最重要的部分是法向矢量的方向.从技术上讲,我们需要检查其中六个,每个面孔一个.确定后,我们将重新定位(The most important part of the code above is the direction of the normal vector. We technically need to check for six of them, one for each face. Once this is determined, then we will reposition the) realtimeCube 捕捉与我们相撞的脸的位置.(position to snap the face we have collided with.)
就是这样.我们将使用鼠标左键在世界上永久放置该块.(That’s pretty much it. We will use the left mouse click button for the permanent placement of the block in the world.) 可以通过以下代码片段完成此操作:(That can be done by the following code snipet:)
if (Input.GetMouseButtonUp(0))
{
    //Destroy(realtimeCube);

    #region Screen To World
    RaycastHit hitInfo = new RaycastHit();
    bool hit
        = Physics.Raycast(Camera.main.ScreenPointToRay(Input.mousePosition),
                          out hitInfo, 50, applyMask);
    if (hit)
    {
        if (Explode)
        {
            var t = hitInfo.transform.GetComponent<TriangleExplosion>();
            StartCoroutine(t.SplitMesh(true));
            return;
        }

        var cube = Instantiate(buildingBlockPref);
        cube.tag = "MyCube";
        cube.name = $"Cube{index}"; index++;
        cube.AddComponent<TriangleExplosion>();
        cube.GetComponent<BoxCollider>().isTrigger = true;
        cube.GetComponent<Renderer>().material = blockMaterial;

        BlockHistory.Add(cube);

        cube.transform.position =
            new Vector3(hitInfo.point.x,
                        hitInfo.point.y+0.5f,
                        hitInfo.point.z);
        #region HIDE
        if (hitInfo.transform.tag.Equals("Base"))
        {
            cube.transform.position =
                new Vector3(hitInfo.point.x,
                            hitInfo.point.y + (0.5f),
                            hitInfo.point.z);
        }
        #region HIDE
        else
        {
            if (hitInfo.normal == new Vector3(0, 0, 1))
            {
                cube.transform.position =
                    new Vector3(hitInfo.transform.position.x,
                                hitInfo.transform.position.y,
                                hitInfo.point.z + (0.5f));
            }
            if (hitInfo.normal == new Vector3(1, 0, 0))
            {
                cube.transform.position =
                    new Vector3(hitInfo.point.x + (0.5f),
                                hitInfo.transform.position.y,
                                hitInfo.transform.position.z);
            }
            if (hitInfo.normal == new Vector3(0, 1, 0))
            {
                cube.transform.position =
                    new Vector3(hitInfo.transform.position.x,
                                hitInfo.point.y + (0.5f),
                                hitInfo.transform.position.z);
            }
            if (hitInfo.normal == new Vector3(0, 0, -1))
            {
                cube.transform.position =
                    new Vector3(hitInfo.transform.position.x,
                                hitInfo.transform.position.y,
                                hitInfo.point.z - (0.5f));
            }
            if (hitInfo.normal == new Vector3(-1, 0, 0))
            {
                cube.transform.position =
                    new Vector3(hitInfo.point.x - (0.5f),
                                hitInfo.transform.position.y,
                                hitInfo.transform.position.z);
            }
            if (hitInfo.normal == new Vector3(0, -1, 0))
            {
                cube.transform.position =
                    new Vector3(hitInfo.transform.position.x,
                                hitInfo.point.y - (0.5f),
                                hitInfo.transform.position.z);
            }
        }
        #endregion

        //Debug.DrawRay(hitInfo.point, hitInfo.normal, Color.red, 2, false);
        //Debug.Log(hitInfo.normal);
        #endregion
    }
    else
    {
        Debug.Log("No hit");
    }
    #endregion
}
这就是在我们的小世界中放置积木所需的一切!(That’s all you need for the placement of the blocks in our little world!)
基本用户界面(Basic User Interface)
最后,我们需要有一种方法来更改或选择我们的材料.这将通过屏幕底部的简单三个按钮选择来完成.(Lastly, we need to have a way to change or select our materials. This will be done by the simple three button selection at the bottom of the screen.)
每个按钮将在(Each button will call the following function on the) OnClick 事件.您可以传递基本参数来确定要更改的材料.(event. You can pass basic parameters to determine which material to change to.)
public void ChangeMaterial(Button button)
{
    selectedMaterialIndex = Convert.ToInt32(button.name.Last().ToString()) - 1;

    blockMaterial = availableMaterials[selectedMaterialIndex];

    if (OnMaterialChanged != null)
        OnMaterialChanged(blockMaterial);
}
这里的所有都是它的.(That’s all there is to it.)
兴趣点(Points of Interest)
这是一个简单的项目,可以扩展为您自己的游戏想法的一个不错的小实用程序.您应该尝试扩展的一些项目是:(This is a simple project that can be extended to become a cool little utility for your own game ideas. Some items that you should try to extend are:)
- 放置它们后编辑块(Editing the blocks after you place them)
- 扩展底座以拥有更多空间(Extending the base to have more space)
- 保存您的模块设计用于下一个会话(Saving your block design for the next session) 所有这三个要点都应该很容易实现,并且对应用程序非常有用.(All of the three bullet points should be pretty easy to implement, and very functional for an application.)
历史(History)
- 5(5)日(th)2019年12月:初始发布.块放置的基础.(December, 2019: Initial publication. Basics of block placement.)
许可
本文以及所有相关的源代码和文件均已获得The Code Project Open License (CPOL)的许可。
C# Unity3D Design Dev application graphics AutoCAD game 新闻 翻译