使用Tensorflow Lite创建一个Android AI应用(译文)
By S.F.
本文链接 https://www.kyfws.com/news/creating-an-android-ai-app-with-tensorflow-lite/
版权声明 本博客所有文章除特别声明外,均采用 BY-NC-SA 许可协议。转载请注明出处!
- 7 分钟阅读 - 3300 个词 阅读量 0使用Tensorflow Lite创建一个Android AI应用(译文)
原文地址:https://www.codeproject.com/Articles/5279604/Creating-an-Android-AI-App-With-Tensorflow-Lite
原文作者:Joel Ivory Johnson
译文由本站翻译
前言
在本文中,我们将创建一个Android应用程序并将其TensorFlow Lite模型导入其中. 在这里,我们使用TensorFlow Lite解释器检查图像并产生其输出. 这是将神经网络与Android上的TensorFlow Lite结合使用的系列文章中的第三篇.在本系列的第2部分中,我们首先从预训练的模型制作了TensorFlow Lite模型.在这一部分中,我们将创建一个Android应用程序并将该模型导入其中.您将需要上一节(yolo.tflite)中创建的.tflite文件. 申请流程如下: 可以通过多种不同方式获取应用程序的源位图:可以从文件系统加载,从设备的相机获取,从网络下载或通过其他方式获取.只要图像可以作为位图加载,那么此处显示的其余代码都可以轻松地适用于此.在此示例程序中,我将使源图像来自图片选择器. 使用清空活动模板创建一个新的Android应用程序.创建应用程序之后,我们需要为应用程序执行一些配置步骤.首先,我们将添加对TensorFlow的引用,以便应用程序具有必要的库来使用TensorFlow Lite和TensorFlow Lite委托用于CPU和NPU.打开应用程序的build.gradle并将以下内容添加到"依赖项"部分:
implementation 'org.tensorflow:tensorflow-lite:0.0.0-nightly'
implementation 'org.tensorflow:tensorflow-lite-gpu:0.0.0-nightly'
implementation 'org.tensorflow:tensorflow-lite-support:0.0.0-nightly'
保存更改并构建应用程序.如果收到有关所需NDK版本不存在的错误,请参考本系列的第1部分.如果应用程序生成,则对build.gradle进行其他更改.在" Android"部分中,必须添加一个设置以指示Android Studio不压缩.tflite文件.在文件的android部分中,添加以下行:
aaptOptions {
	noCompress "tflite"
}
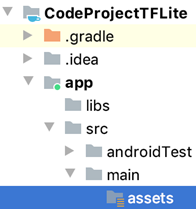
.tflite文件将进入项目的"资产"文件夹.该文件夹在新项目中不存在.您可以在apps/src/main中的项目中创建文件夹.
将文件yolo.tflite复制到资产文件夹. 我们将从允许用户选择图像并显示它的应用程序开始.为此,activity_main.xml文件仅需要几个元素:用于激活图像选择器的按钮和图像视图.
<?xml version="1.0" encoding="utf-8"?>
<androidx.constraintlayout.widget.ConstraintLayout xmlns:android="http://schemas.android.com/apk/res/android"

   xmlns:app="http://schemas.android.com/apk/res-auto"

   xmlns:tools="http://schemas.android.com/tools"

   android:layout_width="match_parent"

   android:layout_height="match_parent"

   tools:context=".MainActivity">


   <ImageView

       android:id="@+id/selectedImageView"

       android:layout_width="match_parent"

       android:layout_height="match_parent"

       android:layout_marginBottom="64dp"

       app:layout_constraintBottom_toBottomOf="parent"

       app:layout_constraintEnd_toEndOf="parent"

       app:layout_constraintStart_toStartOf="parent"

       app:layout_constraintTop_toTopOf="parent" />

   <Button

       android:id="@+id/selectImageButton"

       android:text="@string/button_select_image"

       android:layout_width="wrap_content"

       android:layout_height="wrap_content"

       android:layout_marginTop="8dp"

       app:layout_constraintEnd_toEndOf="parent"

       app:layout_constraintStart_toStartOf="parent"

       app:layout_constraintTop_toBottomOf="@+id/selectedImageView" />
</androidx.constraintlayout.widget.ConstraintLayout>
在文件MainActivity.java中,我们添加执行代码.要从此代码引用图像视图,请添加一个名为" selectedImageView"的字段.
ImageView selectedImageView;
在" onCreate()“中,在” setContentView()“之后添加一行,以将已加载的ImageView实例分配给” selectedImageView".
@Override
protected void onCreate(Bundle savedInstanceState) {
   super.onCreate(savedInstanceState);
   setContentView(R.layout.activity_main);
   selectedImageView = findViewById(R.id.selectedImageView);
}
在布局中定义的按钮将触发打开图像选择器的功能.
final int SELECT_PICTURE = 1;
public void onSelectImageButtonClicked(View view) {
   Intent intent = new Intent(Intent.ACTION_GET_CONTENT);
   intent.setType("image/*");
   Intent chooser = Intent.createChooser(intent, "Choose a Picture");
   startActivityForResult(chooser, SELECT_PICTURE);
}
用户激活此功能后,系统的图像选择器将打开.用户选择图像后,控制权返回给应用程序.要检索选择,活动必须实现方法" onActivityResult()".所选图像的URI在传递给此方法的数据对象内.
public void onActivityResult (int reqCode, int resultCode, Intent data) {
   super.onActivityResult(reqCode, resultCode, data);
   if (resultCode == RESULT_OK) {
       if (reqCode == SELECT_PICTURE) {
           Uri selectedUri = data.getData();
           String fileString = selectedUri.getPath();
           selectedImageView.setImageURI(selectedUri);
       }
   }
}
activity_main.xml中定义的按钮尚未附加到任何代码.将以下行添加到按钮的定义中:
android:onClick="onSelectImageButtonClicked"
如果您现在运行该应用程序,将会看到它能够加载和显示图像.我们想将此图像通过TensorFlow解释器传递.让我们准备好相应的代码. YOLO算法有多种实现.我在这里使用的那个期望图像被分为13列和13行.此网格内的每个单位均为32x32像素.输入图像将为416x416像素(13 * 32 =416).这些值在添加到MainActivity.java的常量中表示.还添加了一个常量,用于保存要加载的.tflite文件的名称,以及一个用于保存TensorFlow Lite解释器的变量.
final String TF_MODEL_NAME = "yolov4.tflite";
final int IMAGE_SEGMENT_ROWS = 13;
final int IMAGE_SEGMENT_COLS = 13;
final int IMAGE_SEGMENT_WIDTH = 32;
final int IMAGE_SEGMENT_HEIGHT = 32;
final int IMAGE_WIDTH = IMAGE_SEGMENT_COLS * IMAGE_SEGMENT_WIDTH; //416
final int IMAGE_HEIGHT = IMAGE_SEGMENT_ROWS * IMAGE_SEGMENT_HEIGHT; //416

Interpreter tfLiteInterpreter;
有几种调整图像大小的选项.我将使用TensorFlow ImageProcessor. ImageProcessor带有我们要应用于图像的操作列表.当给定TensorImage时,ImageProcessor将在图像上执行这些操作,并返回一个新的TensorImage,以供进一步处理.
void processImage(Bitmap sourceImage) {
   ImageProcessor imageProcessor =
           new ImageProcessor.Builder()
                   .add(new ResizeOp(IMAGE_HEIGHT, IMAGE_WIDTH, ResizeOp.ResizeMethod.BILINEAR))
                   .build();
   TensorImage tImage = new TensorImage(DataType.FLOAT32);
   tImage.load(sourceImage);
   tImage = imageProcessor.process(tImage);
   //...
}
我们需要使用我们的模型初始化TensorFlow Lite解释器,以便它可以处理该图像. Interpreter类的构造函数接受一个包含模型的字节缓冲区和一个包含要应用于Interpreter实例的选项的对象.对于这些选项,我们添加了一个GPU委托和一个NNAPI委托.如果设备具有用于加速某些操作的兼容硬件,则在运行TF解释器时将使用该硬件.
void prepareInterpreter() throws IOException {
   if(tfLiteInterpreter == null) {
       GpuDelegate gpuDelegage = new GpuDelegate();
       Interpreter.Options options = new Interpreter.Options();
       options.addDelegate(gpuDelegage);
       //Only add the NNAPI delegate of this were build for Android P or later.
       if(Build.VERSION.SDK_INT >= Build.VERSION_CODES.P) {
           NnApiDelegate nnApiDelegate = new NnApiDelegate();
           options.addDelegate(nnApiDelegate);
       }
       MappedByteBuffer tfLiteModel = FileUtil.loadMappedFile(this, TF_MODEL_NAME);
       tfLiteInterpreter = new Interpreter(tfLiteModel, options);
   }
}
您可能还记得张量通常表示为数组.在函数processImage中,创建了一些缓冲区以接收网络模型的输出.
float[][][][][] buf0 = new float[1][52][52][3][85];
float[][][][][] buf1 = new float[1][26][26][3][85];
float[][][][][] buf2 = new float[1][13][13][3][85];
这些多维数组一开始可能看起来有些吓人.如何处理这些数组中的数据? 让我们集中讨论三个数组中的最后一个.某些网络模型可以同时处理感兴趣的数据集的多个实例.您可能还记得,该算法将416x416像素的图像分为13行和13列.数组的第二维和第三维用于图像的行和列.在这些网格的每个网格中,该算法最多可以为在特定网格位置识别的对象检测3个边界框.尺寸3的第四个维度适用于每个边界框.最后一个维度是85个元素.列表中的前四项用于定义边界框坐标(x,y,宽度,高度).此列表中的第五个元素是介于0和1之间的值,表示框是对象匹配项的置信度.接下来的80个元素是匹配项成为特定对象的概率. 对于我在这里使用的YOLO的实现,最多可以识别80种类型的对象. YOLO还有其他实现可以检测其他一些元素.有时,您可以通过最后一个维度中的元素数量来猜测网络所标识的项目数量.但是,不要依赖于此.要知道哪个位置代表哪些对象,您需要查阅所用网络的文档.这些值的含义和解释将在本系列的下一部分中详细讨论. 这些值打包在一个" HashMap"中,并传递给TensorFlow Lite解释器.
//...
HashMap<Integer, Object> outputBuffers = new HashMap<Integer, Object>();
outputBuffers.put(0, buf0);
outputBuffers.put(1, buf1);
outputBuffers.put(2, buf2);

tfLiteInterpreter.runForMultipleInputsOutputs(new Object[]{tImage.getBuffer()}, outputBuffers);
执行YOLO神经网络的那一行是runForMultipleInputsOutputs().当只有一个输入和输出时,将使用对名为run()的函数的调用.结果存储在第二个参数中传递的数组中.
网络运行并产生输出,但是为了使这些输出有用或有意义,我们需要知道如何解释它们.为了测试,我使用了这张图片.
挖掘一个输出数组,我得到了一系列数字.让我们检查一下前四个.
00: 0.32 01: 0.46 02: 0.71 03: 0.46
前四个数字是匹配的X和Y坐标以及宽度和高度.值从-1到1缩放.必须将它们调整为0到416才能将它们转换为像素尺寸. 数组的其余大多数值均为0.0.对于我正在寻找非零值的结果,在位置19遇到了
12: 0.00   13: 0.00   14: 0.00   15: 0.00
16: 0.00   17: 0.00   18: 0.00   19: 0.91
20: 0.00   21: 0.00   22: 0.00   23: 0.00
数组的整个元素为85个元素,但是在这种情况下,其余的值也为零并被省略.从位置5开始的值是该神经网络可以识别的每类物品的置信度.如果从值位置减去5,我们将得到对象类的索引.对于使该值与对象匹配的类列表,我们将查看位置14(19-5 =14).
00: person        01: bicycle       02: car          03: motorbike
04: airplane      05: bus           06: train        07: truck
08: boat          09: traffic light 10: fire hydrant 11: stop sign
12: parking meter 13: bench         14: bird         15: cat
16: dog           17: horse         18: sheep
在这种情况下,程序已识别出一只鸟.
下一步
现在,我们已经成功地在图像上运行了模型,现在该对模型的输出进行一些有趣的操作了.继续阅读下一篇文章,了解如何解释这些结果并为其创建可视化效果.
许可
本文以及所有相关的源代码和文件均已获得The Code Project Open License (CPOL)的许可。
Java HTML Android AI neural tensorflow 新闻 翻译