使用VS 2019在Windows IoT上进行应用程序开发(译文)
By robot-v1.0
本文链接 https://www.kyfws.com/pi/app-development-on-windows-iot-using-vs-2019-zh/
版权声明 本博客所有文章除特别声明外,均采用 BY-NC-SA 许可协议。转载请注明出处!
- 11 分钟阅读 - 5059 个词 阅读量 0使用VS 2019在Windows IoT上进行应用程序开发(译文)
原文地址:https://www.codeproject.com/Articles/1945985/App-Development-on-Windows-IoT-using-VS-2019
原文作者:Martin Gmuca
译文由本站 robot-v1.0 翻译
前言
In this article, we will look at the process of app development, deploy and debug on Raspberry Pi 3 using VS2019.
在本文中,我们将研究使用VS2019在Raspberry Pi 3上进行应用开发,部署和调试的过程.
介绍(Introduction)
我想使用Visual Studio 2019快速撰写Windows 10 IoT核心开发和调试过程的概述.(I would like to write a quick overview of development and debug process for Windows 10 IoT core using Visual Studio 2019.)
背景(Background)
如果您对在Raspberry Pi 3上运行的Windows 10 IoT核心版感兴趣,建议您阅读有关此主题的其他文章.另外,当您不知道如何在Raspberry Pi上安装Windows 10 IoT核心版时,您会在这里找到它.(If you are interested in Windows 10 IoT Core running on Raspberry Pi 3, I recommend you to read my other articles on this topic. Also, when you do not know how to install Windows 10 IoT Core on your Raspberry Pi, you will find it there.)
- Windows 10 IoT核心介绍(Introduction to Windows 10 IoT core)
- Raspberry Pi上的Windows 10 IoT核心版(4.2019更新)(Windows 10 IoT core on Raspberry Pi (4.2019 update))
构建您的应用(Building Your App)
我们将使用VS 2019构建一个非常简单的Universal Windows应用程序.在此应用程序中,我们将提供一些用于用户交互的按钮,以及一个输出元素,用户可以在其中看到其操作结果.(We will build a very simple Universal Windows application using VS 2019. In this app, we will have some buttons for user interaction and also one output element where user will see result of his actions.)
首先,您需要下载并安装Visual Studio.社区版是免费的,您可以从以下位置下载(First, you need to download and install Visual Studio. Community edition is free and you can download it from) 这里(here) .您将需要拥有一个Microsoft帐户,但这也是免费的.(. You will need to have a Microsoft account, but that is also free.)
安装Visual Studio时,请勾选"(When installing Visual Studio, take care to tick “)通用Windows平台开发(Universal windows platform development)”.(".)

因为Windows 10 IoT核心版只能运行通用Windows应用程序.(because Windows 10 IoT Core can run only Universal windows applications.)
当您安装了Visual Studio后,我们可以创建我们的应用程序.转到菜单文件->新建->项目,然后在弹出窗口中输入"(When you will have Visual Studio installed, we can create our app. Go to menu File->New->Project and in popup window, type “) universal 在搜索框中,然后选择”(" into search box, and choose “)空白应用程序(通用Windows)(Blank App (Universal Windows))”.(".)
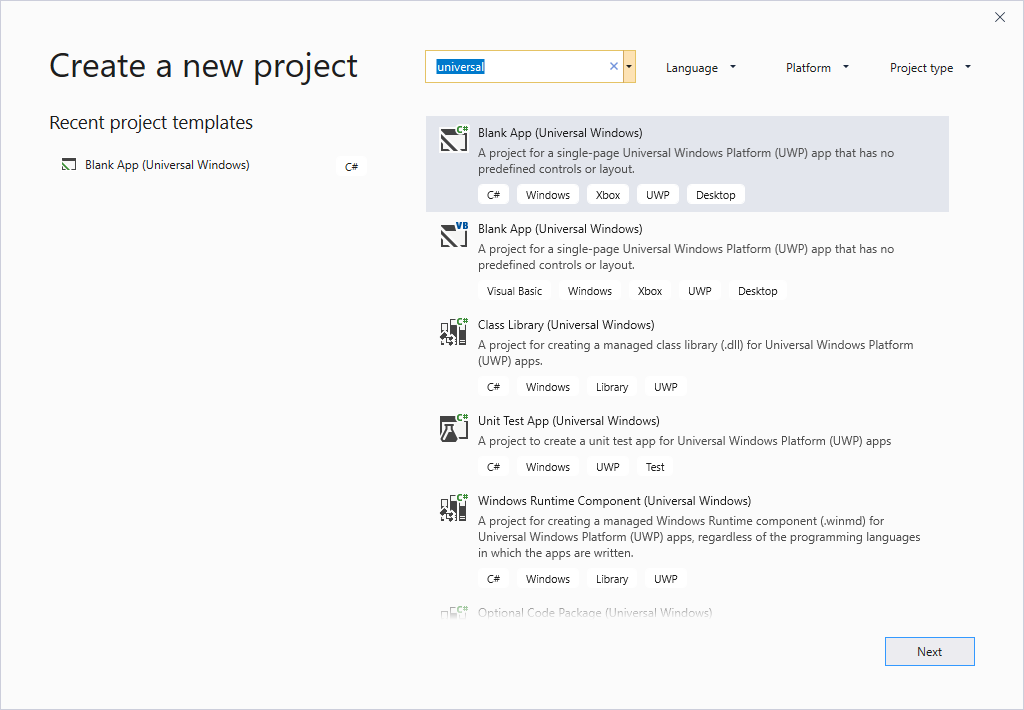
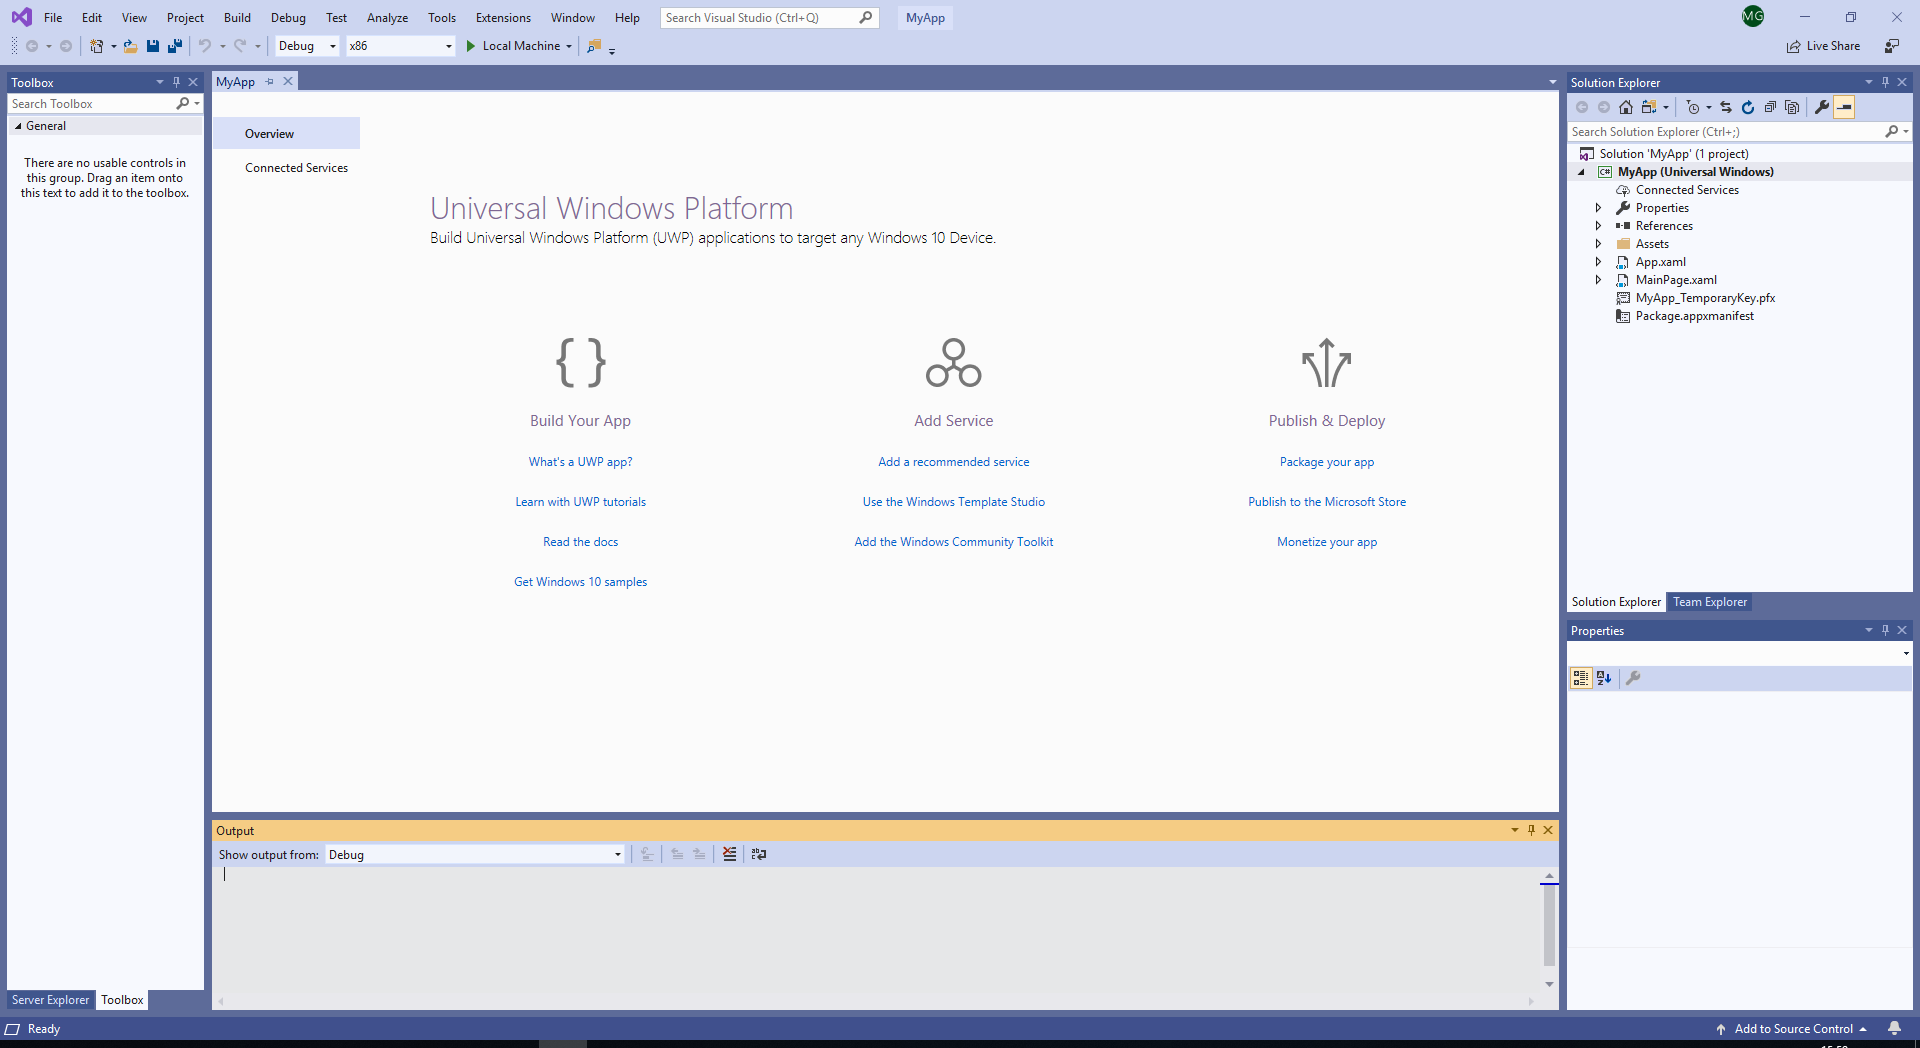
点击 “(Click on “)下一个(Next)".在新的弹出窗口中,选择名称和存储新应用程序的位置.稍后,您将必须选择Windows的目标版本和Windows的最低版本.完成此初始设置后,VS将创建一个新的可运行的Universal Windows应用程序显示空白的窗口,您应该进入如下所示的同一屏幕.(”. On new popup window, choose name and location where your new application will be stored. Later, you will have to choose target version of Windows and minimal version of Windows. After this initial setting, VS will create a new runnable Universal windows application displaying empty white window. You should land on the same screen as shown below.)
由于我们希望保持简单,因此我们将直接在其中进行所有修改(Since we want to keep it simple, we will make all the modifications directly in)MainPage.xaml(MainPage.xaml),因此您可以双击该文件以将其打开.我没有最新的Windows版本,因此在显示XAML设计器时遇到了问题.(, so you can double click this file to open it. I did not have the latest Windows version, so I ran into problems displaying XAML designer.)
我必须将本地计算机更新到最新版本,该过程花了大约一天的时间,因为我的网络连接速度很慢.我建议您下载Windows更新助手,因此您无需在设置中进行Windows更新.您可以从下载(I had to update my local computer to the latest version, which took about one day because I have slow internet connection. I recommend you to download Windows update assistant so you do not need to go through Windows update in settings. You can download it from) 这里(here) .您可以自己编写XAML代码,而无需设计人员(或从本文提供的资源中获取).但是我没有测试这个选项.(. You could write XAML code yourself without designer (or take it from sources available in this article). But I did not test this option.)
因此,当我们有设计师工作时,我们可以创建非常简单的用户界面.它将具有三个按钮和一个彩色矩形.按下按钮后矩形的颜色将改变.初始矩形颜色为黄色,并且按钮将其更改为红色,绿色或蓝色.用户界面如下所示:(So, when we have our designer working, we can create our very simple User interface. It will have three buttons and one colored rectangle. Color of rectangle will change after pressing a button. Initial rectangle color is yellow, and buttons change it to red, green or blue. UI will look like this:)
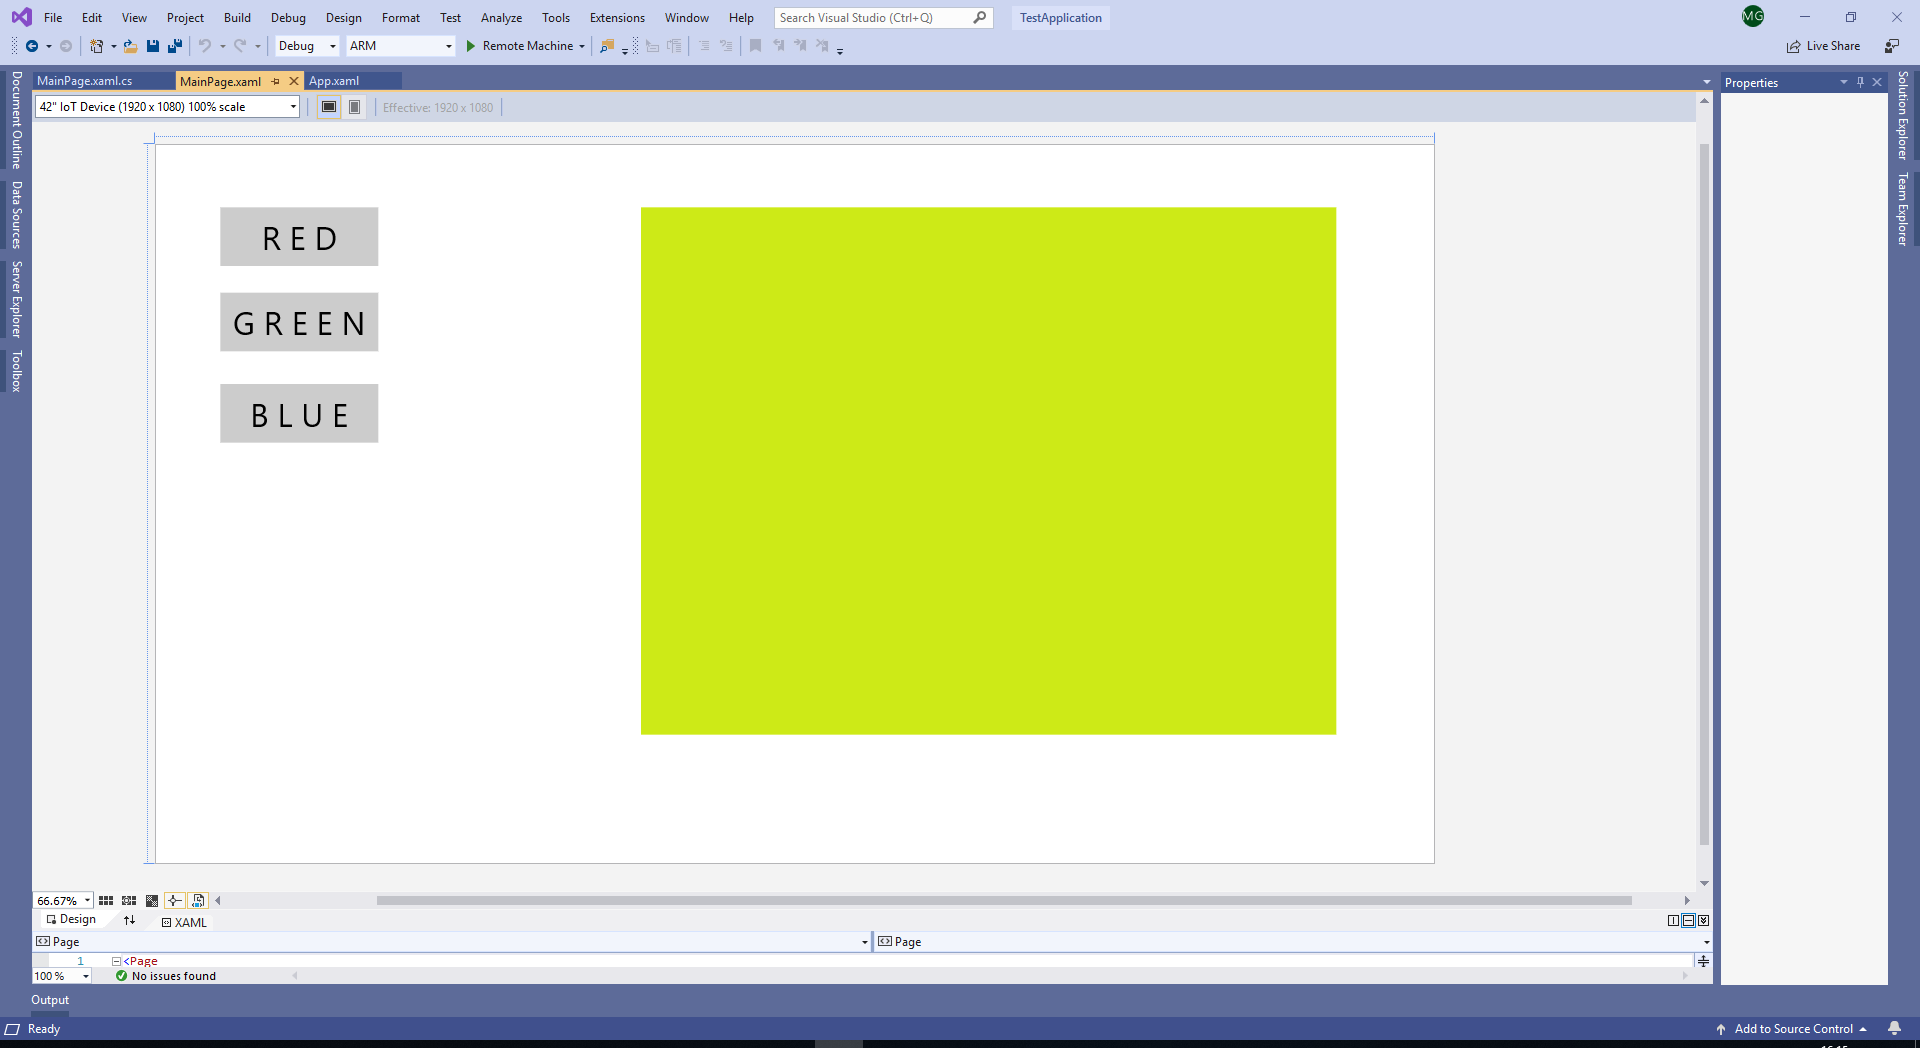
请注意,在设计器中,您可以选择在什么设备上显示您的应用程序,因为我将在连接到Raspberry Pi的电视上运行我的应用程序,所以选择了” 42" IoT Device(1920 x 1080)100%scale".请记住,通用Windows应用程序可以在任何Windows计算机(台式机,Raspberry,Windows Phone或Xbox)上运行,因此VS为您提供了许多屏幕尺寸来测试和查看布局.现在,我们仅针对一种设备和一种屏幕分辨率进行开发,因此这并不重要.(Notice that in designer, you can choose on what device your app is displayed, I have chosen “42'' IoT Device (1920 x 1080) 100% scale” because I will run my app on TV connected to Raspberry Pi. Keep in mind that Universal Windows app can run on any Windows machine (Desktop, Raspberry, Windows Phone, maybe Xbox) so VS gives you many screen sizes to test and see your layout. Now, we develop only for one device and one screen resolution so this does not really matter.) 我们甚至可以使用XAML编写UI,这确实很简单,看起来像这样:(We can write our UI even in XAML, and it is really simple, it will look like this:)
<Page

    x:Class="TestApplication.MainPage"

    xmlns="http://schemas.microsoft.com/winfx/2006/xaml/presentation"

    xmlns:x="http://schemas.microsoft.com/winfx/2006/xaml"

    xmlns:local="using:TestApplication"

    xmlns:d="http://schemas.microsoft.com/expression/blend/2008"

    xmlns:mc="http://schemas.openxmlformats.org/markup-compatibility/2006"

    mc:Ignorable="d"

    Background="{ThemeResource ApplicationPageBackgroundThemeBrush}">    <Grid>
        <Button x:Name="btnRed" Content="R E D" Margin="98,95,0,0"

         VerticalAlignment="Top" Height="88" Width="237" FontSize="48" Click="BtnRed_Click"/>
        <Button x:Name="btnGreen" Content="G R E E N" Margin="98,223,0,0"

         VerticalAlignment="Top" Height="88" Width="237" FontSize="48" Click="BtnGreen_Click"/>
        <Button x:Name="btnBlue" Content="B L U E" Margin="98,360,0,0" Height="88"

         Width="237" VerticalAlignment="Top" FontSize="48" Click="BtnBlue_Click"/>
        <Rectangle x:Name="RectOutput" HorizontalAlignment="Left" Height="791"

         Margin="729,95,0,0" VerticalAlignment="Top" Width="1043" Fill="#FFCDEA17"/>
    </Grid>
</Page>
现在我们的设计已经准备就绪,让我们添加一些功能.您可以双击每个按钮来创建一个(Our design is now ready, let’s add some functionality. You can double click on each button to create a) Click 事件,或者您可以双击(event or, you can double click on) click 属性中每个按钮的事件.不要忘记切换到事件.最后,这是我们的代码:(event for each button in properties. Don’t forget to switch to events. In the end, this is our code:)
private void BtnRed_Click(object sender, RoutedEventArgs e)
      {
          RectOutput.Fill = new SolidColorBrush(Colors.Red);
      }

      private void BtnGreen_Click(object sender, RoutedEventArgs e)
      {
          RectOutput.Fill = new SolidColorBrush(Colors.Green);
      }

      private void BtnBlue_Click(object sender, RoutedEventArgs e)
      {
          RectOutput.Fill = new SolidColorBrush(Colors.Blue);
      }
运行您的应用(Running Your App)
准备就绪后,我们可以在本地计算机上运行应用,并且该应用应该可以正常运行.(When we have this ready, we can run app on our local computer and it should run with no problems.)
现在,我们尝试在Raspberry Pi上运行我们的应用程序. Raspberry已安装并连接到网络.由于Raspberry Pi 3也具有WiFi,您可以将其连接到家庭wifi网络,但是我发现Raspberry上的wifi接收器非常弱,并且由于其wifi信号较弱而无法连接.我将覆盆子通过以太网线连接到笔记本电脑,并设置了通过以太网共享笔记本电脑wifi的功能.在此之后,它没有任何问题.(Now we try to run our app on Raspberry Pi. Raspberry is installed and connected to network. Since Raspberry Pi 3 also has WiFi, you can connect it to your home wifi network, but I find wifi receiver on Raspberry very weak and I had problems connecting to it because it had weak wifi signal. I connected raspberry to my laptop over ethernet wire and set up sharing my laptop wifi over ethernet. After this, it was working with no problems.)
要在树莓派上运行应用程序,您必须首先将解决方案的体系结构更改为" ARM",然后在部署菜单中选择"远程计算机". (请注意,由于您的PC中没有ARM架构处理器,因此无法在本地计算机上运行ARM架构).(To run app on raspberry, you have to first change the architecture of your solution to “ARM”, then in deploy menu, choose “Remote machine”. (Note that you cannot run ARM architecture on your local machine, because you do not have ARM architecture processor in your PC).)

将出现一个新窗口,您可以在其中选择要在其中部署应用程序的远程计算机.通常,您的树莓会自动检测到,但是如果没有,您可以输入其IP地址并连接到它.如果您不知道设备的IP地址,请打开IoT仪表板,它会为您找到,或者您也将其显示在Raspberry Pi附带的屏幕上的IoT默认应用程序中.要更改或查看此设置,请转到您应用的属性,然后点击"(New window will appear which allows you to choose remote machine where you would like to deploy your app. Usually, your raspberry gets auto detected, but if not you can type its IP address and connect to it. If you do not know the IP address of your device, open IoT dashboard and it will find it for you, or you have it also displayed on IoT default application on screen attached to Raspberry Pi. To change or review this setting, go to your app’s properties and “)调试(debug)” 部分.(" section.)

如果一切设置正确,我们的应用程序将在Raspberry Pi上启动,我们甚至将调试器连接到它,因此在应用程序运行期间会遇到VS中的断点.首先,您的应用程序副本可能需要一段时间,因此请耐心等待.(When you have everything set up correctly, our application will start on Raspberry Pi, and we will have connected even debugger to it so our breakpoints in VS will be hit during application run. First, copy of your application can take a while, so be patient.)
部署和调试您的应用(Deploy and Debug Your App)
当然,由于某些原因,可能无法直接从Visual Studio部署和运行,也不必担心,有另一种方法可以使事情正常运行.您可以手动部署您的应用程序,然后使用远程调试器手动将其附加.不幸的是,此选项当前仅适用于Visual Studio 2017.(Of course, it can happen that deploy and run directly from Visual Studio will not work for some reason, you don’t need to worry, there is another approach to make things work. You can deploy your app manually, and manually attach to it using remote debugger. Unfortunately, this option is available currently only for Visual Studio 2017.) 如果您只想尝试在设备上安装应用包,则可以在此处下载就绪的应用包.(If you want to try only installation of app package on device, you can download ready app package here.)
- 下载就绪的应用程序包(Download ready App package)
或者您可以创建自己的.(or you can create your own.)
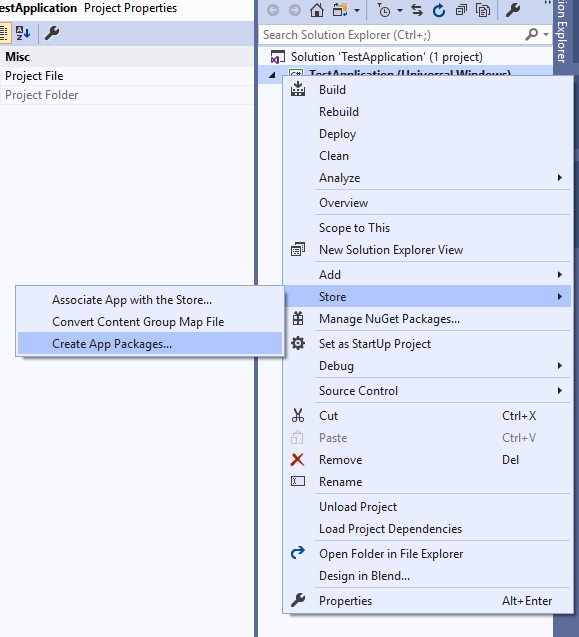
首先,您必须通过右键单击您的项目并选择store-> create app Packages来创建一个应用程序包…(First, you have to create an app package by right clicking on your project and choosing store->create app Packages…)
然后,我们将选择如何安装我们的应用程序. (我们选择侧面加载将其直接复制到设备.)(Then, we will choose how our app will be installed. (We choose sideloading to copy it directly to device.))

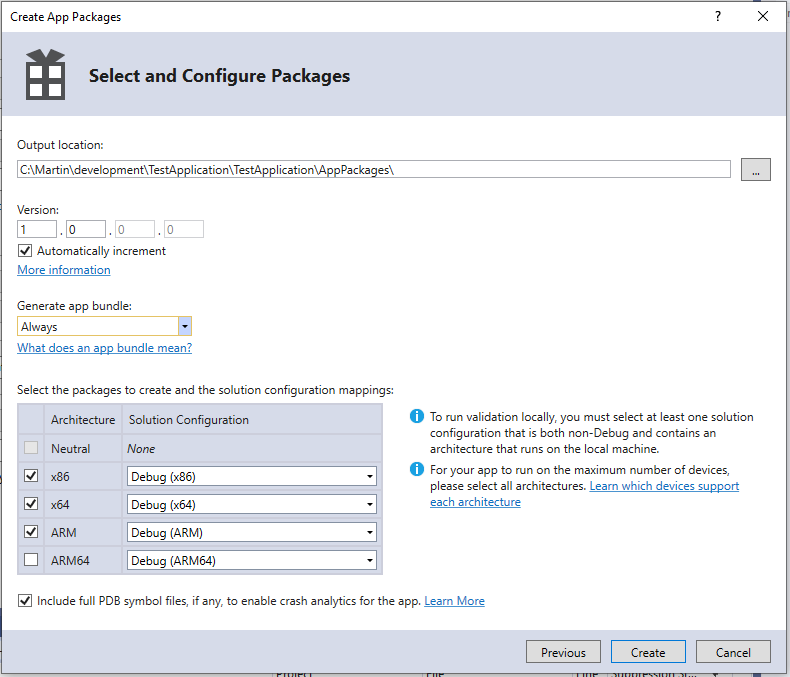
在下一步中,我们将选择要创建的软件包以及将其保存在何处.另外,您将设置您的应用程序版本.(In the next step, we will choose what packages will be created and where they will be saved. Also, you will set up your application version.)
至此,我们已经创建了所有包,因此可以将它们加载到Raspberry.(At this point, we have all packages created, so we can load them to Raspberry.)

现在,我们将打开设备门户并将应用程序直接上传到设备. (使用IoT信息中心*用户名=管理员密码={创建SD卡时设置的}查找设备).(*Now, we will open device portal and upload application directly to device. (Find your device using IoT dashboard username = administrator password={as you set when creating SD card}).)
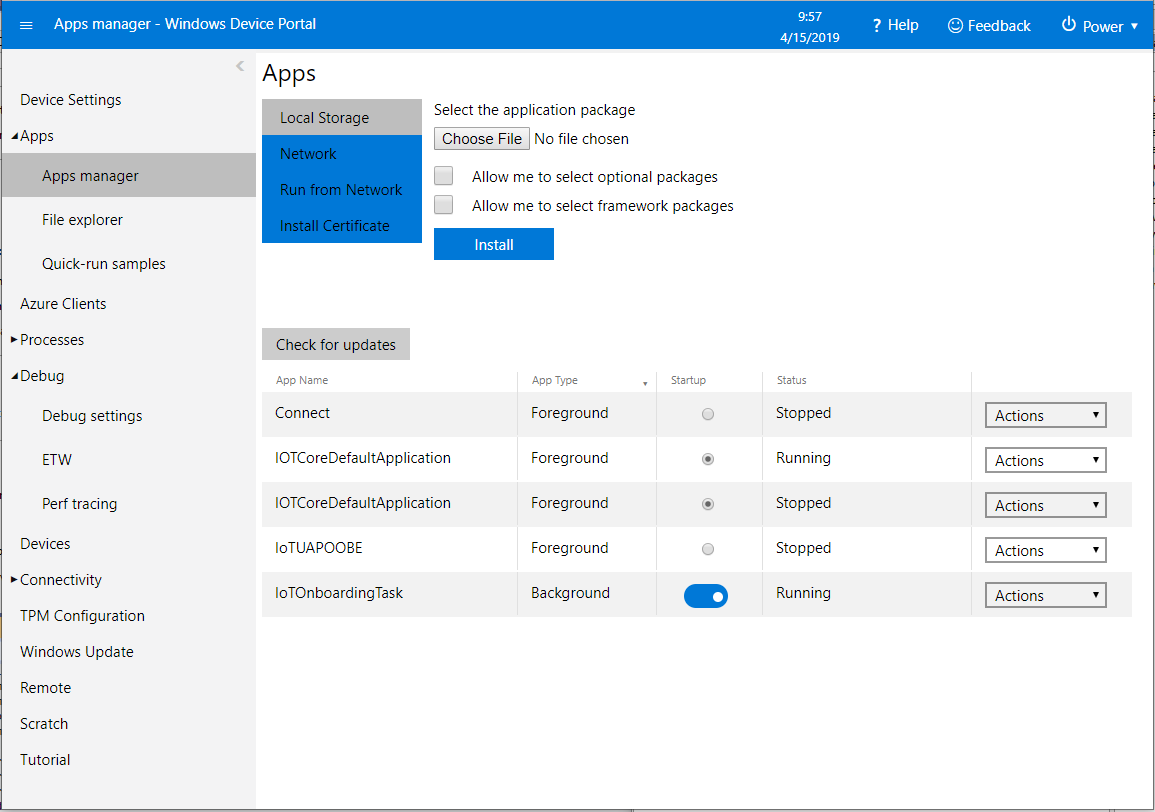
通过点击"(By clicking on button “)选择文件(Choose file)",您可以选择要从本地计算机安装的软件包.对于我来说,我需要导航到”(", you can choose package to install from your local computer. In my case, I needed to navigate to “)testApplication \ AppPackages \ TestApplication_1.0.0.0_Debug_test(testApplication\AppPackages\TestApplication_1.0.0.0_Debug_test)“那是我的(” and there was my)**捆绑包(appxbundle)**文件.然后,您将点击(file. Then, you will click on)安装(Install)按钮,它将在您的设备上注册并安装软件包.最后,您的应用程序将出现在已安装的应用程序列表中,您可以启动它.(button, which will register and install package on your device. In the end, your app will appear in the list of installed apps and you can start it.)
现在,您需要在设备上启动远程调试器.(Now you need to start remote debugger on your device.)
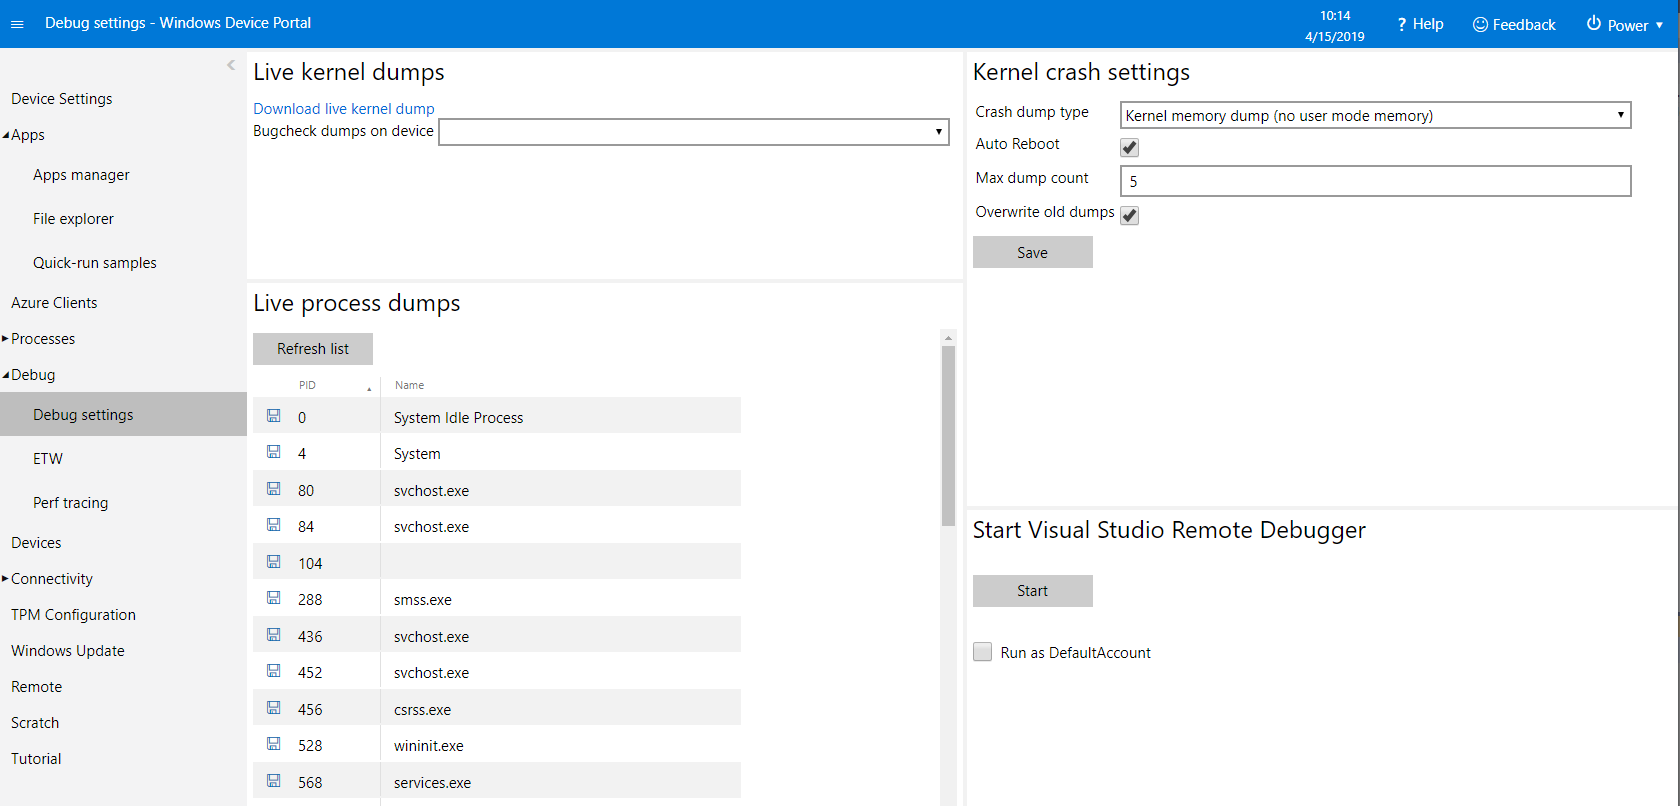
启动后,您会在同一部分中找到有关如何连接它的说明.(When it is started, you will find instructions on how to connect to it written in the same section.)

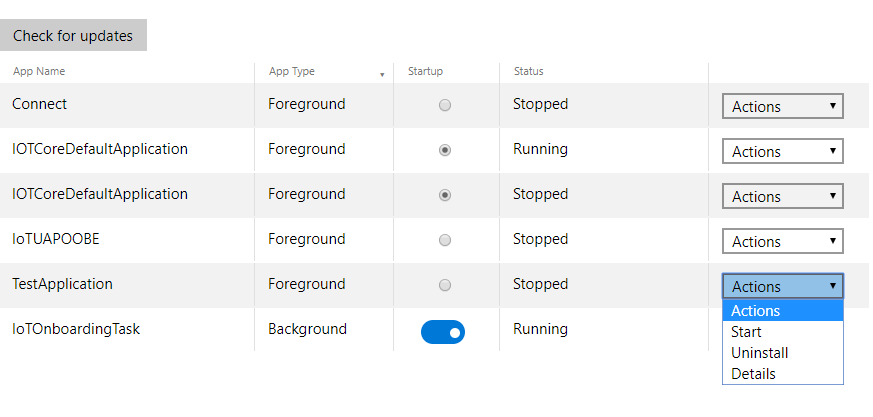
如您所见,当前仅支持Visual Studio 2017,因此您将无法使用Visual Studio 2019连接到设备.(As you can see, only Visual Studio 2017 is currently supported, so you will not be able to connect to device using Visual Studio 2019.) 无论将应用程序加载到设备上的方式如何,只要它位于已安装应用程序列表中,您都可以通过单击应用程序列表中的单选按钮将其设置为启动应用程序.完成此设置后,您的应用将在每次启动时启动.(Regardless of how you load your app to device, when it is in the list of installed apps, you can set it to be startup app simply by clicking radio button in list of apps. After this setting, your app will start on every boot.)
底线(Bottom Line)
我希望本文能帮助您了解Windows 10 IoT核心中的开发,部署和调试过程的全貌.也许,我太详细了,但是我喜欢以一种每个人都可以理解的方式写书,即使没有背景的人也可以.我希望这会鼓励某些人尝试一下并自己看看.(I hope this article helped you to get the whole picture about develop, deploy and debug process in Windows 10 IoT core. Maybe, I go too much into detail, but I like to write in a way that everyone will understand, even people with no background. I hope this will encourage some people to try things out and see for themselves.) 如果您有任何疑问或发现一些错误,请随时发表评论.我很乐意回答/纠正错误.(If you will have any questions, or you find some mistakes, feel free to write a comment. I will be happy to answer it/correct mistakes.) 感谢您的阅读!(Thank you for reading!)
历史(History)
- 16(16)日(th)2019年4月:初始版本(April, 2019: Initial version)
许可
本文以及所有相关的源代码和文件均已获得The Code Project Open License (CPOL)的许可。
XML C# Raspberry Windows XAML Visual-Studio IoT 新闻 翻译