Microsoft IoT Edge入门(译文)
By robot-v1.0
本文链接 https://www.kyfws.com/pi/getting-started-with-microsoft-iot-edge-zh/
版权声明 本博客所有文章除特别声明外,均采用 BY-NC-SA 许可协议。转载请注明出处!
- 8 分钟阅读 - 3598 个词 阅读量 0Microsoft IoT Edge入门(译文)
原文地址:https://www.codeproject.com/Articles/1206240/Getting-Started-with-Microsoft-IoT-Edge
原文作者:MaulikJoshi
译文由本站 robot-v1.0 翻译
前言
Here’s how you can get started with Azure IoT edge. Learn how you can integrated SensorTag with IoT edge running on a Raspberry Pi
这是您如何开始使用Azure IoT Edge的方法.了解如何将SensorTag与在Raspberry Pi上运行的IoT Edge集成 Azure IoT Edge是您自己的前提网关,可帮助您将数据传递到云,同时过滤正在发送的数据.(Azure IoT edge is your own premise gateway that helps you communicate your data to cloud, while simultaneously filtering the data it is sending.) 人们通常不了解(Often, people don’t understand the difference of) 物联网边缘计算与雾计算(IoT edge computing vs fog computing) .在物联网边缘,处理发生在边缘,而在雾计算架构中,处理发生在集中式计算设备上.(. With IoT edge, processing happens at the edge, whereas in a fog computing architecture, the processing happens at a centralised computing device.)
您将从本文中学到什么?(What Will You Learn in this Article?)
- 什么是IoT Edge,它与Fog有何不同(What is IoT Edge, how it differs from Fog)
- Azure IoT Edge如何工作(How Azure IoT edge works)
- 使用Raspberry Pi和TI传感器标签实现Azure IoT边缘(Implement Azure IoT edge with Raspberry Pi and TI sensor Tag) 注意(Note):对于那些不熟悉Raspberry Pi的人来说,它是一台单板计算机,可用于构建IoT概念证明.我经常使用Raspberry Pi作为概念验证网关,以快速构建和测试我的原型.基于Raspberry Pi的构建速度之快令人惊讶,这是因为开源社区慷慨捐赠了可用的库.(: For those of you who aren’t familiar with Raspberry Pi, it is a Single board computer that you can use to build your IoT Proof of concepts. I frequently use Raspberry Pi as a Proof of concept gateway to quickly build and test my prototypes. Building on top of Raspberry Pi is surprisingly fast because of the available libraries that have been generously donated by open source community.)
Azure IoT Edge如何工作?(How Azure IoT Edge Works?)
首先让我们看看哪些组件需要Azure IoT Edge:(Let’s first see what components entail Azure IoT edge:)
-
物联网设备发送数据(IoT devices sending data)
-
物联网协议有助于将数据传输到物联网网关(IoT protocols facilitating data transfer to the IoT gateway)
-
物联网网关,具有:协议投资者,过滤器,云通信功能(IoT Gateway with: Protocol investor, Filter, cloud communication capabilities) 此外,重要的是要了解这个广阔的生态系统.它具有以下功能,具有这些功能:(Further, it is important to understand this vast ecosystem. It has these functionalities with the following features:)
-
设备到云的通信:帮助您选择设备到云的消息,数字孪生的报告属性等.(Device to cloud communication: Helps you select between device to cloud messages, digital twin’s reported properties, etc.)
-
云到设备的通信:选择直接方法,数字孪生所需的属性等.(Cloud to device communication: Select direct methods, digital twin’s desired properties, etc.)
-
使用IoT中心的设备到云和云到设备的消息传递:使用IoT中心将设备发送到云消息,从内置端点读取设备消息(Device to cloud and cloud to device messaging with IoT Hub that: Sends device to cloud messages using IoT hub, reads device messages from the built in end-point)
-
创建设备的自定义端点和路由规则以将消息云化(Create custom end points and routing rules for devices to cloud messages)
-
创建和阅读IoT中心消息(Create and read IoT hub messages) 使用Azure IoT中心,您可以:(Using Azure IoT Hub, you can:)
-
从设备获取文件(Get files from a device)
-
管理设备身份(Manage device identities)
-
控制谁可以访问什么(Control who can access what)
-
同步状态和配置(Synchronize states and configs)
-
在多个设备上安排作业(Schedule a job on multiple devices)
-
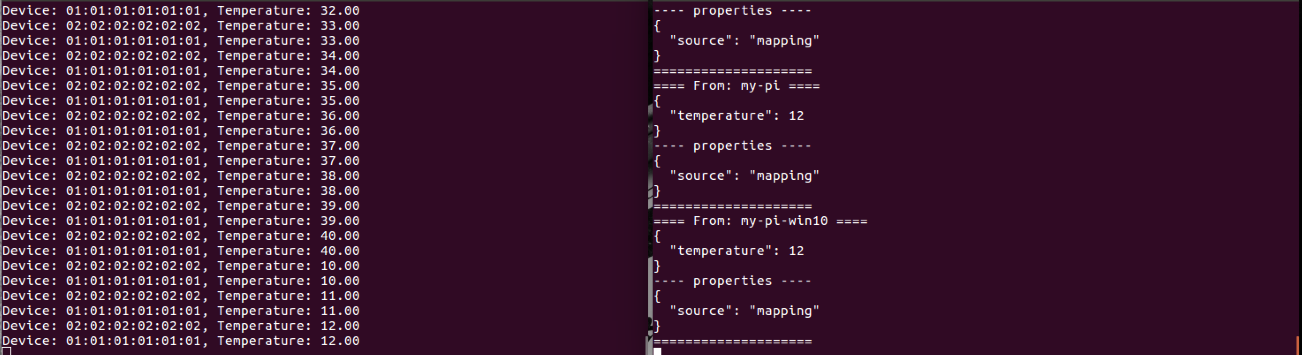
邮件路由,限制配额和限制(Message routing, restrict quotas and throttling) 这是我的Azure IoT Edge示例构建之一.(This is one of my example builds of Azure IoT Edge.) 左侧端子显示(Left side terminal shows) 从设备和右侧终端发送的实际数据使用(actual data sent from the device and right side terminal displays monitored value using)
iothub-explorer监控:(monitor:)
iothub-explorer monitor-events --login "HostName={Your iot hub name}.azure-
devices.net;SharedAccessKeyName=iothubowner;SharedAccessKey={Your IoT Hub key}"

Azure IoT Edge中的协议提取模块详细信息(Protocol Ingestion Module Details in Azure IoT Edge)
- 模块从物理设备读取数据(Module reads data from physical devices)
- 在消息中添加具有MAC地址的属性(Add a property with a MAC address to the message) 以上内容构成了协议提取模块.该模块负责从设备接收数据,并将其从IoT网关推送到云.(The above forms a protocol ingestion module. This module is responsible for receiving data from devices, and pushing it to cloud from the IoT gateway.)
在接下来的步骤中,我们将学习如何在Raspberry Pi上运行IoT Edge,Raspberry Pi使用BLE协议从TI传感器标签收集数据.(In the steps that follow, we will learn how to run IoT edge on Raspberry Pi that collects data from a TI Sensor Tag using BLE protocol.)
在Raspberry Pi上安装IoT Edge的先决条件(Installing the Pre-requisites for IoT Edge on Raspberry Pi)
- 打开外壳并输入:(Open your shell and enter:)
- 通过以下方式安装所有依赖项:(Install all dependencies by:>)
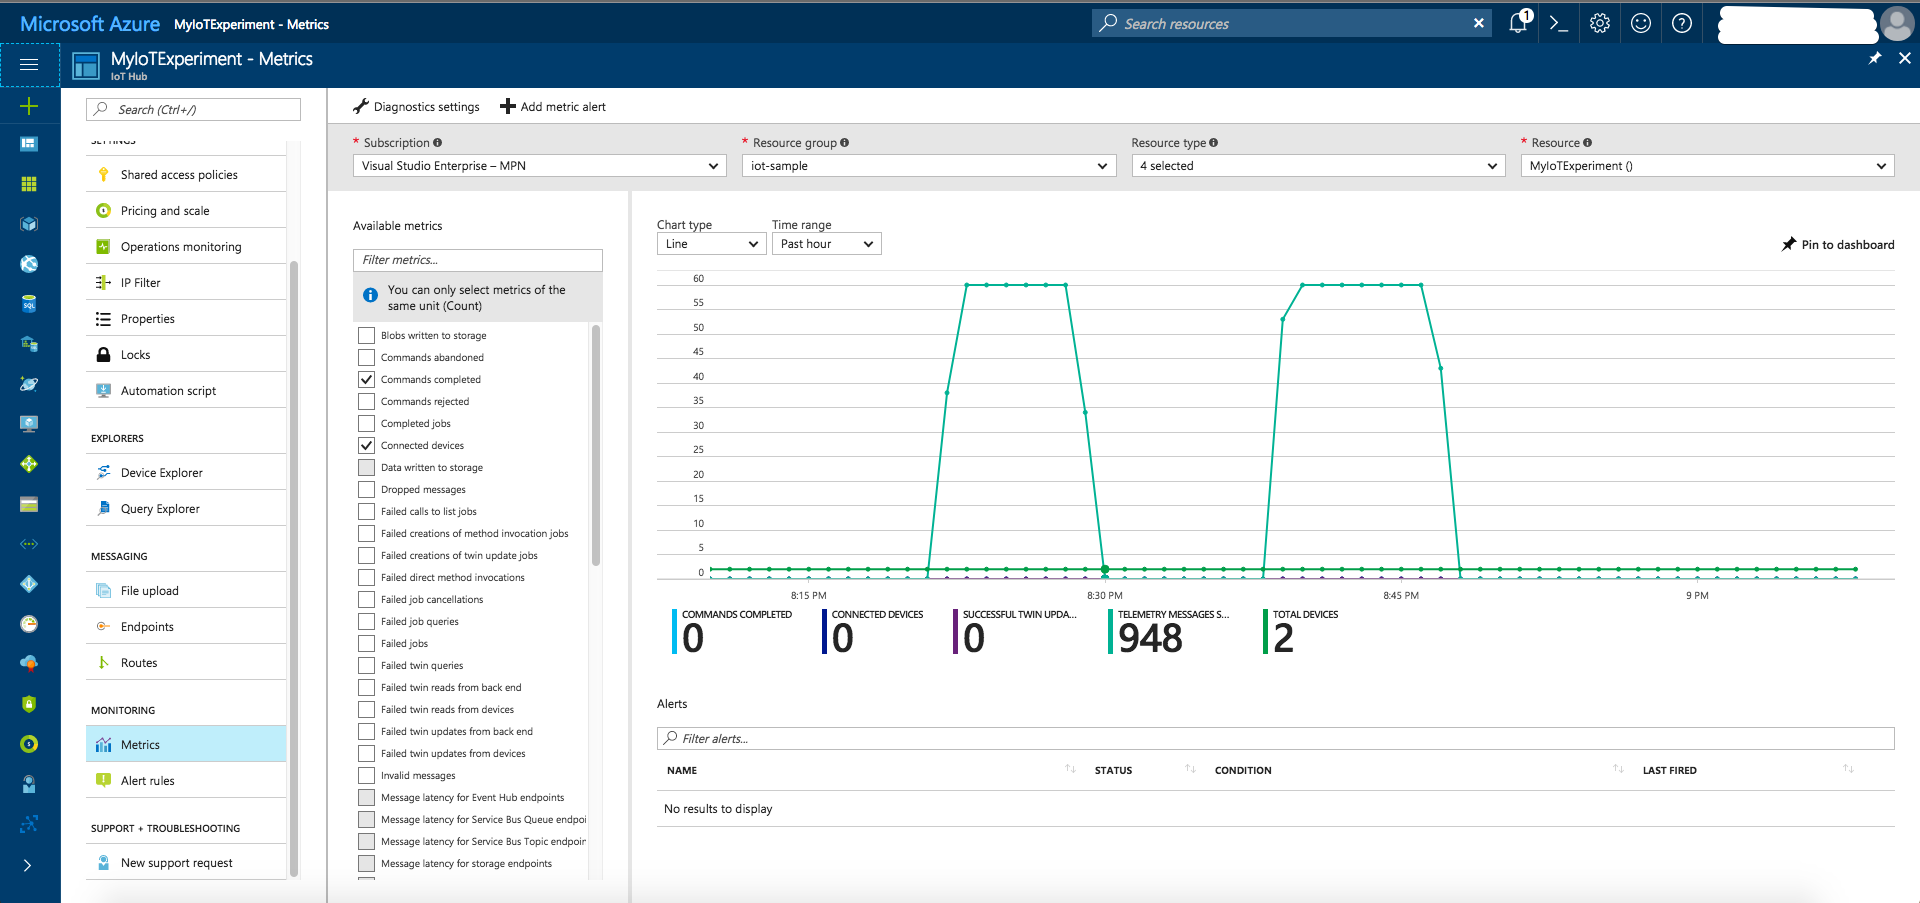
在您的Azure订阅上,执行以下操作(On your Azure Subscription, Do the Following)
- 创建一个物联网中心(Create an IoT Hub)
- 将两个设备添加到IoT中心,并记下它们的ID和密钥.用(Add two devices to your IoT Hub, and note their ids and keys. Use)
iothub-explorer工具来做到这一点.(tool to do that.) 现在,通过以下方法将Azure IoT Edge存储库克隆到本地计算机(Raspberry Pi):(Now, let’s clone the Azure IoT Edge repository to your local machine (Raspberry Pi) by:)
git clone https://github.com/Azure/iot-edge.git
请注意,即使这是微软自己的技术,(Note that even though this is Microsoft’s own tech,)我在处理Windows时遇到大量问题(I faced a huge amount of problems dealing with Windows),并且同样可以在Linux上无缝运行.(, and the same worked seamlessly with Linux.) 如果您以前从未使用过Raspberry Pi,我建议您(If you have never used Raspberry Pi before, I would recommend) 首先通过以下教程(going through the following tutorial first) .确保正确安装了Raspbian.(. Make sure that Raspbian is properly installed.) 安装完成后,您可以轻松地通过SSH进入Raspberry Pi.(Once it is installed, you can easily SSH into your Raspberry Pi.)
将BLE传感器标签与Raspberry Pi集成(Integrating BLE Sensor Tag with Raspberry Pi)
BlueZ堆栈是最常用的库之一,并且是使TI Sensor标签与Raspberry Pi一起工作所必需的.(BlueZ stack is one of the most commonly used libraries and is required to get TI Sensor tag work with your Raspberry Pi.) 在Raspberry Pi上打开控制台,然后输入以下命令:(Open up console on your Raspberry Pi and enter the following commands:)
sudo apt-get update<br /> sudo apt-get install bluetooth blues-tools
build-essential autoconf glib2.0 libglib2.0-dev libdbus-1-dev libudev-dev libical-dev libreadline—dev

wget http://www.kernel.org/pub/linux/bluetooth/bluez-5.37.tar.xz
现在,转到您刚刚创建的目录并配置BlueZ代码:(Now, go to the directory you just created and configure BlueZ code:)
cd blues-5.37 ./configure —disable-dev —disable-systems —enable-experimental

make sudo make install
现在,将系统服务配置更改为BLE:(Now, change systems service config to for BLE:)
ExecStart=/usr/local/libexec/bluetooth/bluetoothd -E
现在,您可以将Raspberry pi与Sensor Tag连接.(Now, you can connect your Raspberry pi with Sensor Tag.)
在之前的笔记中,我写过关于将设备添加到IoT中心的文章.在这里,您可以在此处添加BLE传感器标签,我们称之为(In the previous notes, I wrote about adding your devices to your IoT Hub. Here, you can add your BLE sensor Tag over here, let’s call it) My_sensor_tag .(.)
在Raspberry Pi上配置IoT Edge(Configuring IoT Edge on your Raspberry Pi)
安装依赖项:(Installing dependencies:)
sudo apt-get install cmake uuid-dev curl libcurl4-openssl-dev libssl-dev
我们已经在前面的笔记中克隆了IoT Edge和所有必需的依赖项.(We have already cloned IoT Edge and all required dependencies in our previous notes.) 让我们来构建仓库:(Let’s build the repo:)
cd ~/iot-edge ./tools/build.sh --disable-native-remote-modules
配置每个IoT边缘模块以在Raspberry Pi 3上运行BLE(Configuring Each IoT Edge Module to Run BLE on your Raspberry Pi 3)
配置您的记录器位于(Configuring your logger located in) /home/pi/iot-edge/
该模块应如下所示:(The module should look something like this:)
{
 "name": "Logger",
 "loader": {
   "name" : "native",
   "entrypoint" : {
     "module.path" : "build/modules/logger/liblogger.so"
   }
 },
 "args":
 {
   "filename": "<</path/to/log-file.log>>"
 }
}
BLE模块的配置:(Configuration of the BLE module:)
{
 "name": "SensorTag",
 "loader": {
   "name" : "native",
   "entrypoint" : {
     "module.path": "build/modules/ble/libble.so"
   }
 },
 "args": {
   "controller_index": 0,
   "device_mac_address": "<<AA:BB:CC:DD:EE:FF>>",
   "instructions": [
     {
       "type": "read_once",
       "characteristic_uuid": "00002A24-0000-1000-8000-00805F9B34FB"
     },
     {
       "type": "read_once",
       "characteristic_uuid": "00002A25-0000-1000-8000-00805F9B34FB"
     },
     {
       "type": "read_once",
       "characteristic_uuid": "00002A26-0000-1000-8000-00805F9B34FB"
     },
     {
       "type": "read_once",
       "characteristic_uuid": "00002A27-0000-1000-8000-00805F9B34FB"
     },
     {
       "type": "read_once",
       "characteristic_uuid": "00002A28-0000-1000-8000-00805F9B34FB"
     },
     {
       "type": "read_once",
       "characteristic_uuid": "00002A29-0000-1000-8000-00805F9B34FB"
     },
     {
       "type": "write_at_init",
       "characteristic_uuid": "F000AA02-0451-4000-B000-000000000000",
       "data": "AQ=="
     },
     {
       "type": "read_periodic",
       "characteristic_uuid": "F000AA01-0451-4000-B000-000000000000",
       "interval_in_ms": 1000
     },
     {
       "type": "write_at_exit",
       "characteristic_uuid": "F000AA02-0451-4000-B000-000000000000",
       "data": "AA=="
     }
   ]
 }
}
IoT中心模块配置:(IoT Hub Module configuration:)
{
 "name": "IoTHub",
 "loader": {
   "name" : "native",
   "entrypoint" : {
     "module.path": "build/modules/iothub/libiothub.so"
   }
 },
 "args": {
   "IoTHubName": "<<Azure IoT Hub Name>>",
   "IoTHubSuffix": "<<Azure IoT Hub Suffix>>",
   "Transport" : "amqp"
 }
}
身份管理配置:(Identity management configuration:)
{
 "name": "mapping",
 "loader": {
   "name" : "native",
   "entrypoint" : {
     "module.path": "build/modules/identitymap/libidentity_map.so"
   }
 },
 "args": [
   {
     "macAddress": "<<AA:BB:CC:DD:EE:FF>>",
     "deviceId": "<<Azure IoT Hub Device ID>>",
     "deviceKey": "<<Azure IoT Hub Device Key>>"
   }
 ]
}
BLE打印机模块配置:(BLE printer module configuration:)
{
 "name": "BLE Printer",
 "loader": {
   "name" : "native",
   "entrypoint" : {
     "module.path": "build/samples/ble_gateway/ble_printer/libble_printer.so"
   }
 },
 "args": null
}
BLEC2D模块配置:(BLEC2D Module config:)
{
 "name": "BLEC2D",
 "loader": {
   "name" : "native",
   "entrypoint" : {
     "module.path": "build/modules/ble/libble_c2d.so"
   }
 },
 "args": null
}
路由模块配置应类似于:(Routing Module config should look something like:)
"links" : [
   {"source" : "*", "sink" : "Logger" },
   {"source" : "SensorTag", "sink" : "mapping" },
   {"source" : "SensorTag", "sink" : "BLE Printer" },
   {"source" : "mapping", "sink" : "IoTHub" },
   {"source" : "IoTHub", "sink" : "mapping" },
   {"source" : "mapping", "sink" : "BLEC2D" },
   {"source" : "BLEC2D", "sink" : "SensorTag"}
]
现在,为了运行它,以ble_gateway二进制文件的参数形式将路径传递到JSON配置文件.如果您正在使用(Now, in order to run it, pass the path to the JSON config file in form of a paramter to ble_gateway binary. If you are using)gateway_sample.json(gateway_sample.json),在Raspberry Pi上运行以下命令:(, run the following on your Raspberry Pi:)
./build/samples/ble_gateway/ble_gateway./samples/ble_gateway/src/gateway_sample.json
您可以使用以下命令监视设备到云的消息:(You can monitor device to cloud messages using the following command:)
iothub-explorer monitor-events --login "HostName={Your iot hub name}.azure-
devices.net;SharedAccessKeyName=iothubowner;SharedAccessKey={Your IoT Hub key}"
你去!您的第一个使用Azure IoT Edge的IoT Edge网关实现!(There you go! Your first IoT Edge gateway implementation using Azure IoT edge!)
如果您有任何看法,我也将围绕IoT Edge探索其他一些数据模型,我很乐意向您学习.(I am exploring a few other data models around IoT Edge as well, in case you have any perspectives, I would love to learn from you.)
许可
本文以及所有相关的源代码和文件均已获得The Code Project Open License (CPOL)的许可。
Python2.7 cloud Azure Dev Architect IoT 新闻 翻译