如何从HTC Vive获取原始(位置)数据?(译文)
By robot-v1.0
本文链接 https://www.kyfws.com/games/how-to-get-raw-positional-data-from-htc-vive-zh/
版权声明 本博客所有文章除特别声明外,均采用 BY-NC-SA 许可协议。转载请注明出处!
- 6 分钟阅读 - 2965 个词 阅读量 0如何从HTC Vive获取原始(位置)数据?(译文)
原文地址:https://www.codeproject.com/Articles/1171122/How-to-Get-Raw-Positional-Data-from-HTC-Vive
原文作者:Kamran Bigdely-Shamloo
译文由本站 robot-v1.0 翻译
前言
This article explains how to get position (x,y,z) and rotation (qw, qx, qy, qz) of HTC Vive headset or controllers.
本文介绍了如何获取HTC Vive耳机或控制器的位置(x,y,z)和旋转(qw,qx,qy,qz).
介绍(Introduction)
如果您想阅读HTC Vive耳机或控制器的位置(x,y,z)和旋转(qw,qx,qy,qz),那么本文适合您.在本文中,我们将创建一个后台Windows应用程序,该应用程序将获取位置数据并将其同时使用powershell写入文本文件并在控制台上.最终项目可用(If you want to read the position (x,y,z) and rotation (qw, qx, qy, qz) of HTC Vive headset or controllers, then this article is for you. In this article, we create a background Windows application that grabs the positional data and write them into a text file and on the console at the same time using powershell. The final project is available) 在github上(here at github) .(.)
分步说明(Step-by-step Explanation)
为了从HTC Vive系统中获取原始位置(和旋转)数据,请执行以下操作:(In order to get raw positional (and rotational) data out of HTC Vive system, do this:)
1)获取此项目(由Valve Software提供):(1) Get this project (which is provided by Valve Software):) https://github.com/ValveSoftware/openvr(https://github.com/ValveSoftware/openvr)
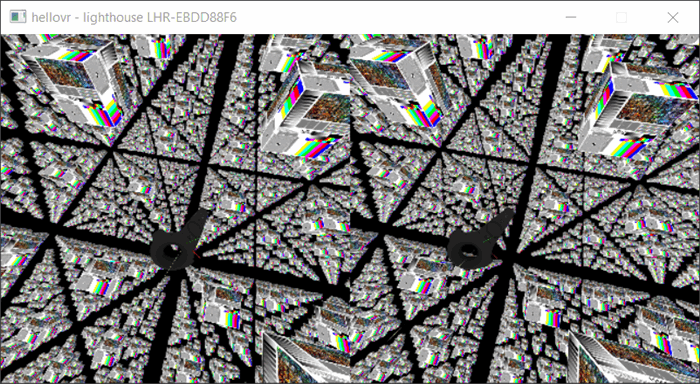
2)开放(2) Open)样品/样品_vs2010.sln(samples/samples_vs2010.sln)Visual Studio提供的解决方案文件.然后,运行它以确保一切正常.您应该看到一个如下所示的窗口,您可以转头看立方体.如果打开控制器,您也应该能够看到它们.(solution file by visual studio. Then, run it to make sure everyting works. You should see a window like the following appears and you can turn your head around and see the cubes. If you turn on the controllers, you should also be able to see them.)
注意(Note):如果出现错误"(: If you get the error “)无法启动VR运行时:多次尝试后共享IPC连接失败(308)(Unable to init VR runtime: Shared IPC Connect Failed After Multiple Attempts (308))",您应该经营视觉工作室(”, you should run your visual studio)作为管理员(as administrator)(通过右键单击其图标并选择"以管理员身份运行").((by right-clicking on its icon and choosing ‘Run as administrator).)
3)使该应用程序成为后台应用程序.为此,在"(3) Make the application as a background application. To do this, in “)hellovr_opengl_main.cpp(hellovr_opengl_main.cpp)“文件,找到(” file, find) vr::VR_Init() 调用并更改此:(call and change this:)
m_pHMD = vr::VR_Init( &eError, vr::VRApplication_Scene );
对此:(to this:)
m_pHMD = vr::VR_Init(&eError, vr::VRApplication_Background);
这有两个效果:(This has two effects:)
- 它使应用程序在后台运行,因此不会显示该窗口.(It makes the application to run in the background so the window will not be displayed.)
- 它不再启动SteamVR.因此,要运行后台应用程序,应确保SteamVR已在运行.(It does not start SteamVR anymore. So for running your background application, you should make sure SteamVR is already running.)
4)删除所有与openGL和场景创建有关的内容.(4) Take out all the stuff related to openGL and scene creation.)
在里面(In the)
CMainApplication::BInit()方法,注释以下内容(我将其显示为注释):(method, comment the following (I’m displaying it as commented):)
    //m_pRenderModels = (vr::IVRRenderModels *)vr::VR_GetGenericInterface( vr::IVRRenderModels_Version, &eError );
    //if( !m_pRenderModels )
    //{
    //    m_pHMD = NULL;
    //    vr::VR_Shutdown();

    //    char buf[1024];
    //    sprintf_s( buf, sizeof( buf ), "Unable to get render model interface: %s", vr::VR_GetVRInitErrorAsEnglishDescription( eError ) );
    //    SDL_ShowSimpleMessageBox( SDL_MESSAGEBOX_ERROR, "VR_Init Failed", buf, NULL );
    //    return false;
    //}

    //int nWindowPosX = 700;
    //int nWindowPosY = 100;
    //Uint32 unWindowFlags = SDL_WINDOW_OPENGL | SDL_WINDOW_SHOWN;

    //SDL_GL_SetAttribute( SDL_GL_CONTEXT_MAJOR_VERSION, 4 );
    //SDL_GL_SetAttribute( SDL_GL_CONTEXT_MINOR_VERSION, 1 );
    //SDL_GL_SetAttribute( SDL_GL_CONTEXT_PROFILE_MASK, SDL_GL_CONTEXT_PROFILE_COMPATIBILITY );
    //SDL_GL_SetAttribute( SDL_GL_CONTEXT_PROFILE_MASK, SDL_GL_CONTEXT_PROFILE_CORE );

    //SDL_GL_SetAttribute( SDL_GL_MULTISAMPLEBUFFERS, 0 );
    //SDL_GL_SetAttribute( SDL_GL_MULTISAMPLESAMPLES, 0 );
    //if( m_bDebugOpenGL )
    //    SDL_GL_SetAttribute( SDL_GL_CONTEXT_FLAGS, SDL_GL_CONTEXT_DEBUG_FLAG );

    //m_pCompanionWindow = SDL_CreateWindow( "hellovr", nWindowPosX, nWindowPosY, m_nCompanionWindowWidth, m_nCompanionWindowHeight, unWindowFlags );
    //if (m_pCompanionWindow == NULL)
    //{
    //    printf( "%s - Window could not be created! SDL Error: %s\n", __FUNCTION__, SDL_GetError() );
    //    return false;
    //}

    //m_pContext = SDL_GL_CreateContext(m_pCompanionWindow);
    //if (m_pContext == NULL)
    //{
    //    printf( "%s - OpenGL context could not be created! SDL Error: %s\n", __FUNCTION__, SDL_GetError() );
    //    return false;
    //}

    //glewExperimental = GL_TRUE;
    //GLenum nGlewError = glewInit();
    //if (nGlewError != GLEW_OK)
    //{
    //    printf( "%s - Error initializing GLEW! %s\n", __FUNCTION__, glewGetErrorString( nGlewError ) );
    //    return false;
    //}
    //glGetError(); // to clear the error caused deep in GLEW

    //if ( SDL_GL_SetSwapInterval( m_bVblank ? 1 : 0 ) < 0 )
    //{
    //    printf( "%s - Warning: Unable to set VSync! SDL Error: %s\n", __FUNCTION__, SDL_GetError() );
    //    return false;
    //}

...
    //std::string strWindowTitle = "hellovr - " + m_strDriver + " " + m_strDisplay;
    //SDL_SetWindowTitle( m_pCompanionWindow, strWindowTitle.c_str() );

    //// cube array
     //m_iSceneVolumeWidth = m_iSceneVolumeInit;
     //m_iSceneVolumeHeight = m_iSceneVolumeInit;
     //m_iSceneVolumeDepth = m_iSceneVolumeInit;

     //m_fScale = 0.3f;
     //m_fScaleSpacing = 4.0f;

     //m_fNearClip = 0.1f;
     //m_fFarClip = 30.0f;

     //m_iTexture = 0;
     //m_uiVertcount = 0;
...

    //if (!BInitGL())
    //{
    //    printf("%s - Unable to initialize OpenGL!\n", __FUNCTION__);
    //    return false;
    //}
在里面(In the) CMainApplication::RunMainLoop() 方法,注释以下内容(显示为注释):(method, comment the following (shown as commented):)
    //SDL_StartTextInput();
    //SDL_ShowCursor( SDL_DISABLE );
...
    //RenderFrame();
...
//SDL_StopTextInput();
在里面(In the) CMainApplication::ProcessVREvent(...) 方法,注释以下内容(显示为注释):(method, comment the following (shown as commented):)
//SetupRenderModelForTrackedDevice( event.trackedDeviceIndex );
5)编写代码以获取并打印位置数据.为此,找到方法(5) Write code in order to grab and print out positional data. To do this, find the method) CMainApplication::HandleInput() ,然后添加(, and add) printPositionalData() 方法调用(尚未创建)如下:(method call (not created yet) as follows:)
bool CMainApplication::HandleInput()
{

...

    // Process SteamVR events
    vr::VREvent_t event;
    while( m_pHMD->PollNextEvent( &event, sizeof( event ) ) )
    {
        ProcessVREvent( event );
    }


    printPositionalData();

    // Process SteamVR controller state
    for( vr::TrackedDeviceIndex_t unDevice = 0; unDevice < vr::k_unMaxTrackedDeviceCount; unDevice++ )
    {
...
}
现在,我们需要创建此函数:(Now, we need to create this funtion:)
//-----------------------------------------------------------------------------
// Purpose: Prints out position (x,y,z) and rotation (qw,qx,qy,qz) into the console.
//-----------------------------------------------------------------------------
void CMainApplication::printPositionalData()
{

    // Process SteamVR device states
    for (vr::TrackedDeviceIndex_t unDevice = 0; unDevice < vr::k_unMaxTrackedDeviceCount; unDevice++)
    {
        if (!m_pHMD->IsTrackedDeviceConnected(unDevice))
            continue;

        vr::VRControllerState_t state;
        if (m_pHMD->GetControllerState(unDevice, &state, sizeof(state)))
        {
            vr::TrackedDevicePose_t trackedDevicePose;
            vr::TrackedDevicePose_t trackedControllerPose;
            vr::VRControllerState_t controllerState;
            vr::HmdMatrix34_t poseMatrix;
            vr::HmdVector3_t position;
            vr::HmdQuaternion_t quaternion;
            vr::ETrackedDeviceClass trackedDeviceClass = vr::VRSystem()->GetTrackedDeviceClass(unDevice);

            switch (trackedDeviceClass) {
            case vr::ETrackedDeviceClass::TrackedDeviceClass_HMD:
                vr::VRSystem()->GetDeviceToAbsoluteTrackingPose(vr::TrackingUniverseStanding, 0, &trackedDevicePose, 1);
                // print positiona data for the HMD.
                poseMatrix = trackedDevicePose.mDeviceToAbsoluteTracking; // This matrix contains all positional and rotational data.
                position = GetPosition(trackedDevicePose.mDeviceToAbsoluteTracking);
                quaternion = GetRotation(trackedDevicePose.mDeviceToAbsoluteTracking);

                printDevicePositionalData("HMD", poseMatrix, position, quaternion);

                break;

            case vr::ETrackedDeviceClass::TrackedDeviceClass_GenericTracker:
                vr::VRSystem()->GetDeviceToAbsoluteTrackingPose(vr::TrackingUniverseStanding, 0, &trackedDevicePose, 1);
                // print positiona data for a general vive tracker.
                break;

            case vr::ETrackedDeviceClass::TrackedDeviceClass_Controller:
                vr::VRSystem()->GetControllerStateWithPose(vr::TrackingUniverseStanding, unDevice, &controllerState,
                    sizeof(controllerState), &trackedControllerPose);
                poseMatrix = trackedControllerPose.mDeviceToAbsoluteTracking; // This matrix contains all positional and rotational data.
                position = GetPosition(trackedControllerPose.mDeviceToAbsoluteTracking);
                quaternion = GetRotation(trackedControllerPose.mDeviceToAbsoluteTracking);

                auto trackedControllerRole = vr::VRSystem()->GetControllerRoleForTrackedDeviceIndex(unDevice);
                std::string whichHand = "";
                if (trackedControllerRole == vr::TrackedControllerRole_LeftHand)
                {
                    whichHand = "LeftHand";
                }
                else if (trackedControllerRole == vr::TrackedControllerRole_RightHand)
                {
                    whichHand = "RightHand";
                }

                switch (trackedControllerRole)
                {
                case vr::TrackedControllerRole_Invalid:
                    // invalid
                    break;

                case vr::TrackedControllerRole_LeftHand:
                case vr::TrackedControllerRole_RightHand:
                    printDevicePositionalData(whichHand.c_str(), poseMatrix, position, quaternion);

                    break;
                }

                break;
            }

        }
    }

}
此方法使用其他三种方法:(This method uses three other methods:) GetRotation() ,(,) GetPosition() 和(and) printDevicePositionalData(...) ,我们如下创建前两种方法(从(, we create the first two methods as follows (from) Omnifinity github回购(Omnifinity github repo) ):():)
//-----------------------------------------------------------------------------
// Purpose: Calculates quaternion (qw,qx,qy,qz) representing the rotation
// from: https://github.com/Omnifinity/OpenVR-Tracking-Example/blob/master/HTC%20Lighthouse%20Tracking%20Example/LighthouseTracking.cpp
//-----------------------------------------------------------------------------

vr::HmdQuaternion_t CMainApplication::GetRotation(vr::HmdMatrix34_t matrix) {
    vr::HmdQuaternion_t q;

    q.w = sqrt(fmax(0, 1 + matrix.m[0][0] + matrix.m[1][1] + matrix.m[2][2])) / 2;
    q.x = sqrt(fmax(0, 1 + matrix.m[0][0] - matrix.m[1][1] - matrix.m[2][2])) / 2;
    q.y = sqrt(fmax(0, 1 - matrix.m[0][0] + matrix.m[1][1] - matrix.m[2][2])) / 2;
    q.z = sqrt(fmax(0, 1 - matrix.m[0][0] - matrix.m[1][1] + matrix.m[2][2])) / 2;
    q.x = copysign(q.x, matrix.m[2][1] - matrix.m[1][2]);
    q.y = copysign(q.y, matrix.m[0][2] - matrix.m[2][0]);
    q.z = copysign(q.z, matrix.m[1][0] - matrix.m[0][1]);
    return q;
}
//-----------------------------------------------------------------------------
// Purpose: Extracts position (x,y,z).
// from: https://github.com/Omnifinity/OpenVR-Tracking-Example/blob/master/HTC%20Lighthouse%20Tracking%20Example/LighthouseTracking.cpp
//-----------------------------------------------------------------------------

vr::HmdVector3_t CMainApplication::GetPosition(vr::HmdMatrix34_t matrix) {
    vr::HmdVector3_t vector;

    vector.v[0] = matrix.m[0][3];
    vector.v[1] = matrix.m[1][3];
    vector.v[2] = matrix.m[2][3];

    return vector;
}
这是第三种方法(And here is the third method) printDevicePositionalData() 它添加了高分辨率时间戳和格式数据:(which adds high-resolution time stamps and format data:)
//-----------------------------------------------------------------------------
// Purpose: Prints the timestamped data in proper format(x,y,z).
//-----------------------------------------------------------------------------

void CMainApplication::printDevicePositionalData(const char * deviceName, vr::HmdMatrix34_t posMatrix, vr::HmdVector3_t position, vr::HmdQuaternion_t quaternion)
{
    LARGE_INTEGER qpc; // Query Performance Counter for Acquiring high-resolution time stamps.
                       // From MSDN: "QPC is typically the best method to use to time-stamp events and
                       // measure small time intervals that occur on the same system or virtual machine.
    QueryPerformanceCounter(&qpc);

    // Print position and quaternion (rotation).
    dprintf("\n%lld, %s, x = %.5f, y = %.5f, z = %.5f, qw = %.5f, qx = %.5f, qy = %.5f, qz = %.5f",
        qpc.QuadPart, deviceName,
        position.v[0], position.v[1], position.v[2],
        quaternion.w, quaternion.x, quaternion.y, quaternion.z);


    // Uncomment this if you want to print entire transform matrix that contains both position and rotation matrix.
    //dprintf("\n%lld,%s,%.5f,%.5f,%.5f,x: %.5f,%.5f,%.5f,%.5f,y: %.5f,%.5f,%.5f,%.5f,z: %.5f,qw: %.5f,qx: %.5f,qy: %.5f,qz: %.5f",
    //    qpc.QuadPart, whichHand.c_str(),
    //    posMatrix.m[0][0], posMatrix.m[0][1], posMatrix.m[0][2], posMatrix.m[0][3],
    //    posMatrix.m[1][0], posMatrix.m[1][1], posMatrix.m[1][2], posMatrix.m[1][3],
    //    posMatrix.m[2][0], posMatrix.m[2][1], posMatrix.m[2][2], posMatrix.m[2][3],
    //    quaternion.w, quaternion.x, quaternion.y, quaternion.z);

}
现在,确保SteamVR正在运行,并且可以检测到您的控制器和耳机.从Visual Studio中运行应用程序(确保您以管理员身份运行Visual Studio).(Now, make sure the SteamVR is running and it can detect your controllers and your headset. Run the application from within Visual Studio (make sure you’re running Visual Studio as administrator).)
在这一阶段,您应该可以在”(At this stage, you should be able to see the output of the application in the ‘)输出量(Output)Visual Studio的窗口如下:(’ window of Visual Studio as follows:)
5)将输出写入文本文件.为此,请运行" PowerShell"(5) Write the outputs into a text file. To do this, run the ‘PowerShell’)作为管理员(as administrator).然后,cd进入包含二进制文件的文件夹:(. Then, cd into the folder containing the binary file:)
光盘(cd)C:[…](C:[…]*)样本\ bin \ win32(samples\bin\win32)然后,输入以下命令:(Afterwards, enter the following command:)
C:\ […] \ samples \ bin \ win32>(C:[…]\samples\bin\win32>).\ hellovr_opengl.exe | T恤vroutput.txt(.\hellovr_opengl.exe | tee vroutput.txt*)
输出同时(同时)写入控制台和文件" vroutput.txt"(位于同一文件夹中):(*The output is written (at the same time) both on the console and on the file “vroutput.txt” (located in the same folder):*)

文本文件" vroutput.txt":(Text file “vroutput.txt” :)

许可
本文以及所有相关的源代码和文件均已获得The Code Project Open License (CPOL)的许可。
C++ Windows 新闻 翻译