OAG库(OpenGL)第2.3部分-使用鼠标以编程方式绘制2D纹理(译文)
By robot-v1.0
本文链接 https://www.kyfws.com/games/oag-library-opengl-part-2-3-drawing-2d-textures-us-zh/
版权声明 本博客所有文章除特别声明外,均采用 BY-NC-SA 许可协议。转载请注明出处!
- 6 分钟阅读 - 2899 个词 阅读量 0OAG库(OpenGL)第2.3部分-使用鼠标以编程方式绘制2D纹理(译文)
原文地址:https://www.codeproject.com/Articles/96396/OAG-Library-OpenGL-Part-2-3-Drawing-2D-Textures-Us
原文作者:Eduardo Tucci
译文由本站 robot-v1.0 翻译
前言
This tutorial shows library code for 2D Textures and how to draw them programatically using the mouse in an MFC application.
本教程显示了2D纹理的库代码,以及如何在MFC应用程序中使用鼠标以编程方式绘制它们.
- 下载示例-83.3 KB(Download sample - 83.3 KB)
- 下载源代码-4.92 MB(Download source code - 4.92 MB)
- 在此处从SourceForge下载最新的源代码和演示(Download latest source code and demo from SourceForge here)
介绍(Introduction)
在本教程中,我们将看到如何绘制2D纹理.您必须下载该库才能编译示例.请点击(In this tutorial, we will see how to draw 2D Textures. You must download the library to compile the sample. Click) 这里(here) 转到下载页面.使用OAG_2D,您可以保存和打开XML文件((to go to the download page. Using OAG_2D, you can save and open XML files ()*** .oagxml(**.oagxml*)**).(*).*)
2D纹理和包装(2D Textures And Wrap)
| 没有包装(No wrap) | 重覆(Repeating) | 夹紧(Clamping) |
|---|---|---|
 |
|
|
|
绘制2D纹理(Drawing 2D Textures)
要使用库绘制字体,您需要创建一个实例(To draw fonts using the library, you need to create an instance of) oag::TextureMappingTable 存储纹理并创建一个实例(to store a texture and to create an instance of) TextureMapping .班级(. The class) oag::TextureMappingTable 管理用于绘制的纹理.选择纹理并将其存储在类中后(manages the textures used to draw. Once you choose a texture and store it in the class) oag::TextureMappingTable ,它将添加到类中的纹理数组列表中(, it is added in an array list of textures in the class) oag::TextureMappingTable .可用于纹理映射的类是(. The classes available for texture mapping are) oag::OAGRectangleMapping 和(and) oag::OAGTriangleMapping .班级(. The class) oag::OAGRectangleMapping 将纹理绘制为矩形,然后类(draws a texture as a rectangle, and the class) oag::OAGTriangleMapping 将纹理绘制为三角形.班级(draws a texture as a triangle. The classes) oag::OAGRectangleMapping 和(and) oag::OAGTriangleMapping 使用存储在类中的纹理(use a texture stored in the class) oag::TextureMappingTable 在屏幕上绘制纹理.(to draw a texture on the screen.)
设置文档类别(Setting Up the Document Class)
文件成员:(Members for the document:)
oag::ObjectsMappingTable*    pObjectsMappingTable;
oag::OAGScene*                m_pScene;
文档的操作:(Operations for the document:)
void CreateLibraryObjects();
void UnloadLibraryObjects();
构造函数和析构函数:(Constructor and destructor:)
COAGMFCDoc::COAGMFCDoc()
:m_pScene(NULL)
,m_pObjectsMappingTable(NULL)
{
  CreateLibraryObjects();
}

COAGMFCDoc::~COAGMFCDoc()
{
   UnloadLibraryObjects();

}

void COAGMFCDoc::CreateLibraryObjects()
{
  if( m_pObjectsMappingTable == NULL)
     m_pObjectsMappingTable = new oag::ObjectsMappingTable();

  if( m_pScene == NULL )
  {
     m_pScene = new oag::OAGScene();
     m_pScene->SetFontMappingTable(
                 m_pObjectsMappingTable->GetFontMappingTable() );
     m_pScene->SetTextureMappingTable(
                 m_pObjectsMappingTable->GetTextureMappingTable() );
  }
}

void COAGMFCDoc::UnloadLibraryObjects()
{
   //Deletes the scene and all objects from the memory
   if ( m_pScene )
   {
       m_pScene->DeleteAllObjects();

     delete m_pScene;
     m_pScene = NULL;
   }

   if ( m_pObjectsMappingTable )
   {
       delete m_pObjectsMappingTable;
      m_pObjectsMappingTable = NULL;
   }
}
创建新文档时,我们需要删除所有对象,然后重新创建它们.(When a new document is created, we need to delete all the objects and create them again.)
BOOL COAGMFCDoc::OnNewDocument()
{
  if (!CDocument::OnNewDocument())
   return FALSE;


  //Deleting all library objects when a new document is started.

  UnloadLibraryObjects();
  CreateLibraryObjects();

  UpdateAllViews(NULL);

  return TRUE;
}
插入纹理(Inserting a Texture)
要插入纹理,请单击TableObjects菜单,单击"纹理",然后选择一个纹理文件.(To insert a Texture, click on the TableObjects menu, click on Texture, and choose a texture file.)

对于演示,我们将使用一个或两个纹理.如果选择一种纹理,则将使用一种纹理看到对象(For the demo, we will use one or two textures. If you choose one texture, you will see the object using one) Texture .如果选择两个纹理,则可以使用(. If you choose two textures, you can draw objects using) MultiTexture .通过单击命令菜单项选择纹理时,将创建纹理的过滤器.(. The filters for the texture are created when you choose a texture by clicking in a command menu item.)
void COAGMFCDoc::OnInsertTexture()
{
  CString filter;
  filter.LoadString( IDS_TEXTURE_FILTER );

  CFileDialog dlg(TRUE, "*.*", NULL,
     OFN_FILEMUSTEXIST | OFN_PATHMUSTEXIST, filter );

  if(dlg.DoModal() == IDOK)
  {
     CString strFileName = dlg.GetPathName().GetString();

     POSITION pos = GetFirstViewPosition();
     COAGMFCView* pView =  (COAGMFCView*) GetNextView(pos);

    if ( pView->m_pWinGraphicContext->MakeCurrent() )
    {
       oag::OAGTexture* pTexture =
         oag::OAGTextureLoader::LoadTextureFromDisk( strFileName.GetString() );

       if( pTexture )
       {
          if( m_pScene->GetTextureMappingTable()->m_ListTexture.size() < 1)
             pTexture->SetTextureName("Image1");
         else
           pTexture->SetTextureName("Image2");

         oag::TextureMappingTable* pTexMapTable =
            m_pObjectsMappingTable->GetTextureMappingTable();

         if ( pTexMapTable == NULL || !pTexMapTable->AddTexture( pTexture ) )
              delete pTexture;
          else
             pTexMapTable->AddTexture( pTexture );
        }
        pView->m_pWinGraphicContext->DeleteCurrent();
    }
  }
}
插入2D纹理(Inserting a 2D Texture)
现在我们可以从(Now we can get the texture from) m_pTextureMappingTable 使用(using) m_pScene->GetTextureMappingTable()->GetTexture("Image1") ) .请记住(. Remember that) Image1 是为上面加载的纹理指定的纹理名称.(is a texture name given for the texture loaded above.)

定义纹理过滤器(Defining Texture Filters)
| 枚举OAG_TEXTURE_FILTER(ENUM OAG_TEXTURE_FILTER) | OpenGL命令(OpenGL Command) |
|---|---|
MAG_FILTER_NEAREST |
glTexParameteri(GL_TEXTURE_2D, GL_TEXTURE_MAG_FILTER, GL_NEAREST) |
MAG_FILTER_LINEAR |
glTexParameteri(GL_TEXTURE_2D, GL_TEXTURE_MAG_FILTER, GL_LINEAR) |
MAG_FILTER_GL_NEAREST_MIPMAP_LINEAR |
glTexParameteri(GL_TEXTURE_2D, GL_TEXTURE_MAG_FILTER, GL_NEAREST_MIPMAP_LINEAR) |
MAG_FILTER_GL_NEAREST_MIPMAP_NEAREST |
glTexParameteri(GL_TEXTURE_2D, GL_TEXTURE_MAG_FILTER, GL_NEAREST_MIPMAP_NEAREST); |
MAG_FILTER_GL_LINEAR_MIPMAP_LINEAR |
glTexParameteri(GL_TEXTURE_2D, GL_TEXTURE_MAG_FILTER, GL_LINEAR_MIPMAP_LINEAR) |
MAG_FILTER_GL_LINEAR_MIPMAP_NEAREST |
glTexParameteri(GL_TEXTURE_2D, GL_TEXTURE_MAG_FILTER, GL_LINEAR_MIPMAP_NEAREST) |
MIN_FILTER_NEAREST |
glTexParameteri(GL_TEXTURE_2D, GL_TEXTURE_MIN_FILTER, GL_NEAREST) |
MIN_FILTER_LINEAR |
glTexParameteri(GL_TEXTURE_2D, GL_TEXTURE_MIN_FILTER, GL_LINEAR) |
MIN_FILTER_GL_NEAREST_MIPMAP_LINEAR |
glTexParameteri(GL_TEXTURE_2D, GL_TEXTURE_MIN_FILTER, GL_NEAREST_MIPMAP_LINEAR) |
MIN_FILTER_GL_NEAREST_MIPMAP_NEAREST |
glTexParameteri(GL_TEXTURE_2D, GL_TEXTURE_MIN_FILTER, GL_NEAREST_MIPMAP_NEAREST) |
MIN_FILTER_GL_LINEAR_MIPMAP_LINEAR |
glTexParameteri(GL_TEXTURE_2D, GL_TEXTURE_MIN_FILTER, GL_LINEAR_MIPMAP_LINEAR) |
MIN_FILTER_GL_LINEAR_MIPMAP_NEAREST |
glTexParameteri(GL_TEXTURE_2D, GL_TEXTURE_MIN_FILTER, GL_LINEAR_MIPMAP_NEAREST) |
将滤镜添加到纹理(Adding Filters to the Texture)
功能(The function) GetTexture 用于选择纹理.在这种情况下,我们将使用(is used to choose a texture. In this case, we will use) Image1.
oag::OAGTexture* t1 = GetTexture("Image1");

std::vector<OAG_TEXTURE_FILTER> filterList;
filterList.push_back( MAG_FILTER_LINEAR);
filterList.push_back( MIN_FILTER_LINEAR);
t1->SetTextureMode(GL_MODULATE);
t1->SetTextureFilter( filterList );
定义纹理包裹(Defining Texture Wraps)
| 枚举OAG_TEXTURE_WRAP(ENUM OAG_TEXTURE_WRAP) | OpenGL命令(OpenGL Command) |
|---|---|
WRAP_S_REPEAT |
glTexParameteri(GL_TEXTURE_2D, GL_TEXTURE_WRAP_S, GL_REPEAT) |
WRAP_S_CLAMP |
glTexParameteri(GL_TEXTURE_2D, GL_TEXTURE_WRAP_S, GL_CLAMP) |
WRAP_T_REPEAT |
glTexParameteri(GL_TEXTURE_2D, GL_TEXTURE_WRAP_T, GL_REPEAT) |
WRAP_T_CLAMP |
glTexParameteri(GL_TEXTURE_2D, GL_TEXTURE_WRAP_T, GL_CLAMP) |
添加环绕重复到纹理(Adding Wrap Repeating to the Texture)
oag::OAGTexture* t1 = GetTexture("Image1");

std::vector<OAG_TEXTURE_FILTER> filterList;
filterList.push_back( MAG_FILTER_LINEAR);
filterList.push_back( MIN_FILTER_LINEAR);
t1->SetTextureFilter( filterList );

std::vector<OAG_TEXTURE_WRAP> wrapList;
wrapList.push_back( WRAP_S_REPEAT);
wrapList.push_back( WRAP_T_REPEAT);
t1->SetTextureWrap( wrapList );
t1->SetWrapValue( 4 );

t1->SetTextureMode(GL_MODULATE);
向纹理添加环绕夹持(Adding Wrap Clamping to the Texture)
oag::OAGTexture* t1 = GetTexture("Image1");

std::vector<OAG_TEXTURE_FILTER> filterList;
filterList.push_back( MAG_FILTER_LINEAR);
filterList.push_back( MIN_FILTER_LINEAR);
t1->SetTextureFilter( filterList );

std::vector<OAG_TEXTURE_WRAP> wrapList;
wrapList.push_back( WRAP_S_CLAMP);
wrapList.push_back( WRAP_T_CLAMP);
t1->SetTextureWrap( wrapList );
t1->SetWrapValue( 4 );

t1->SetTextureMode(GL_MODULATE);
矩形贴图(Rectangle Mapping)
要插入矩形映射类型的2D纹理,请选择TexureMapping菜单,选择RasterImage Rectangle或RasterImage Rectangle Repeating或RasterImage Rectangle Clamping,然后在屏幕上单击以插入矩形纹理映射.(To insert a 2D Texture of type Rectangle Mapping, select the TexureMapping menu, choose RasterImage Rectangle, or RasterImage Rectangle Repeating, or RasterImage Rectangle Clamping, and click on the screen to insert a rectangle texture mapping.)

void CRasterImageRectTool::AddAllVerticesToScene()
{
    m_pWinGraphicContext->MakeCurrent();

    oag::OAGRectangleMapping* tex = new oag::OAGRectangleMapping();
    oag::OAGVector3f vec1 = m_arrVector[0];
    tex->SetPosition( oag::OAGVector3f( vec1.m_X, vec1.m_Y, vec1.m_Z ) );

    oag::OAGTexture* t1 =  m_pScene->GetTextureMappingTable()->GetTexture("Image1");
    if ( t1 )
    {
        //Clear filters and wraps set for the texture
        t1->ClearFiltersAndWraps();

        std::vector<oag::OAGTexture::TEXTURE_FILTER> filterList;

        switch( m_textureRenderMode)
        {
            case NORMAL:
                {
                    //Filters
                    filterList.push_back( MAG_FILTER_LINEAR);
                    filterList.push_back( MIN_FILTER_LINEAR);
                }
                break;
            case REAPEATING:
                {
                    //Filters
                    filterList.push_back( MAG_FILTER_LINEAR);
                    filterList.push_back( MIN_FILTER_LINEAR);

                    //Reapeating
                    std::vector<oag::OAGTexture::OAG_TEXTURE_WRAP> wrapList;
                    wrapList.push_back( WRAP_S_REPEAT);
                    wrapList.push_back( WRAP_T_REPEAT);
                    t1->SetTextureWrap( wrapList );
                    t1->SetWrapValue( 6 );//Value for texture reapeating

                    t1->SetTextureMode( GL_MODULATE );
                }
                break;
            case CLAMPING:
                {
                    //Filters
                    filterList.push_back( MAG_FILTER_LINEAR);
                    filterList.push_back( MIN_FILTER_LINEAR);

                    //Clamping
                    std::vector<oag::OAGTexture::OAG_TEXTURE_WRAP> wrapList;
                    wrapList.push_back( WRAP_S_CLAMP);
                    wrapList.push_back( WRAP_T_CLAMP);
                    t1->SetTextureWrap( wrapList );
                    t1->SetWrapValue( 4 ); //Value for texture clamping

                    t1->SetTextureMode( GL_MODULATE );
                }
                break;
        }

        t1->SetTextureFilter( filterList );
        t1->SetTextureHeight(256);
        t1->SetTextureWidth(256);
        t1->BuildTexture();
    }

    tex->SetTexture(t1);
    m_pScene->AddObject( tex );

    m_pWinGraphicContext->DeleteCurrent();
}
要插入"三角形映射"类型的2D纹理,请选择" TexureMapping"菜单,选择" RasterImage Triangle"," RasterImage Triangle Repeating"或" RasterImage Triangle Clamping",然后在屏幕上单击以插入三角形纹理映射.(To insert a 2D texture of type Triangle Mapping, select the TexureMapping menu, choose RasterImage Triangle, or RasterImage Triangle Repeating, or RasterImage Triangle Clamping, and click on the screen to insert a triangle texture mapping.)

void CRasterImageTriangleTool::AddAllVerticesToScene()
{
    m_pWinGraphicContext->MakeCurrent();

    oag::OAGTriangleMapping* tex = new oag::OAGTriangleMapping();
    oag::OAGVector3f vec1 = m_arrVector[0];
    tex->SetPosition( oag::OAGVector3f( vec1.m_X, vec1.m_Y, vec1.m_Z ) );

    oag::OAGTexture* t1 = m_pScene->GetTextureMappingTable()->GetTexture("Image1");
    if ( t1 )
    {
        //Clear filters and wraps set for the texture
        t1->ClearFiltersAndWraps();

        std::vector<oag::OAGTexture::TEXTURE_FILTER> filterList;

        switch( m_textureRenderMode)
        {
            case NORMAL:
            {
                //Filters
                filterList.push_back( MAG_FILTER_LINEAR);
                filterList.push_back( MIN_FILTER_LINEAR);
            }
            break;
        case REAPEATING:
            {
                //Filters
                filterList.push_back( MAG_FILTER_LINEAR);
                filterList.push_back( MIN_FILTER_LINEAR);

                //Reapeating
                std::vector<oag::OAGTexture::OAG_TEXTURE_WRAP> wrapList;
                wrapList.push_back( WRAP_S_REPEAT);
                wrapList.push_back( WRAP_T_REPEAT);
                t1->SetTextureWrap( wrapList );
                t1->SetWrapValue( 6 );//Value for texture reapeating

                t1->SetTextureMode( GL_MODULATE );
            }
            break;
        case CLAMPING:
            {
                //Filters
                filterList.push_back( MAG_FILTER_LINEAR);
                filterList.push_back( MIN_FILTER_LINEAR);

                //Clamping
                std::vector<oag::OAGTexture::OAG_TEXTURE_WRAP> wrapList;
                wrapList.push_back( WRAP_S_CLAMP);
                wrapList.push_back( WRAP_T_CLAMP);
                t1->SetTextureWrap( wrapList );
                t1->SetWrapValue( 4 ); //Value for texture clamping

                t1->SetTextureMode( GL_MODULATE );
            }
            break;
        }

        t1->SetTextureFilter(filterList);
        t1->SetTextureHeight(256);
        t1->SetTextureWidth(256);
        t1->BuildTexture();
    }

    tex->SetTexture( t1 );
    m_pScene->AddObject( tex );

    m_pWinGraphicContext->DeleteCurrent();
}
XML文件(The XML File)
在下面显示的XML中,节点(In the XML shown below, the node) Tables 存储节点(stores a node) Textures .节点(. The node) Textures 存储用于绘制2D纹理的纹理.对于此示例,我们使用了(stores the textures used for drawing a 2D texture. For this sample, we used)本田(honda.bmp).节点(. The node) <Texture Name="Image1" FileName="honda.bmp"/> 显示这一点.(shows this.)
节点(The node) Objects 存储要在屏幕上绘制的2D纹理.节点(stores the 2D textures to draw on the screen. The node) TextureMapping 显示这一点.节点(shows this. The node) <UseTexture Name="Image1"/> 在(in) TextureMappings 表示两个2D纹理将使用该纹理(means that the two 2D textures will use the texture) image1 在加载此XML时绘制.(to draw when this XML is loaded.)
<OAGLibrary>
<?xml version="1.0" encoding="ISO-8859-1"?>
<OAGLibrary>
  <Scene>
    <Tables>
      <Textures>
        <Texture Name="Image1" FileName="honda-pcx.jpg"/>
      </Textures>
    </Tables>
    <Objects>
      <TextureMapping Name="" Type="Rectangle">
        <Transform>
          <Translation x="5." y="49." z="0."/>
        </Transform>
        <UseTexture Name="Image1"/>
      </TextureMapping>
      <TextureMapping Name="" Type="Triangle">
        <Transform>
          <Translation x="589." y="52." z="0."/>
        </Transform>
        <UseTexture Name="Image1"/>
      </TextureMapping>
    </Objects>
  </Scene>
</OAGLibrary>
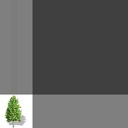
加载XML之后,您将看到以下两个纹理:(After loading the XML, you will see these two textures:)

创建纹理顶点(Creating the Texture Vertices)
void oag::OAGTexture::CreateTextureVertices()
{
    switch( m_enumTextureMapping )
    {
      case OAG_TEXTURE_MAP_RECT:
          {
               m_nNumberOfPoints = 4;

               m_nTextureVertices.resize( 0 );
               m_nTextureVertices.reserve( m_nNumberOfPoints );

               m_nTextureVertices.push_back(
                        oag::OAGVector3d(m_position.m_X, m_position.m_Y, 0));
               m_nTextureVertices.push_back( oag::OAGVector3d( m_position.m_X,
                                             m_position.m_Y + m_nHeight, 0));
               m_nTextureVertices.push_back( oag::OAGVector3d(m_position.m_X + m_nWidth,
                                             m_position.m_Y + m_nHeight, 0) );
               m_nTextureVertices.push_back( oag::OAGVector3d(m_position.m_X +
                                             m_nWidth, m_position.m_Y) );
          }
          break;
      case OAG_TEXTURE_MAP_TRIANGLE:
          {
            m_nNumberOfPoints = 3;

        m_nTextureVertices.resize( 0 );
        m_nTextureVertices.reserve( m_nNumberOfPoints );

        m_nTextureVertices.push_back(
              oag::OAGVector3d(m_position.m_X, m_position.m_Y, 0 ) );
        m_nTextureVertices.push_back( oag::OAGVector3d(m_position.m_X +
                                      m_nWidth, m_position.m_Y, 0) );
        m_nTextureVertices.push_back( oag::OAGVector3d(m_position.m_X +
                                    (m_nWidth/2.f), m_position.m_Y + m_nHeight, 0) );
      }
      break;
    }
}
创建纹理坐标(Creating the Texture Coordinates)
void oag::OAGTexture::CreateTextureCoordinates()
{
  m_nTextureCoordinates.resize(0);

  switch( m_enumTextureMapping)
  {
   case OAG_TEXTURE_MAP_RECT:
   {
     //Rectangle
     m_nNumberOfCoordinates = 8;
     float values[8] = { 0, 0, 0, m_fWrapValue, m_fWrapValue,
                         m_fWrapValue, m_fWrapValue, 0 };

     m_nTextureCoordinates.reserve(8);

     for(int i=0; i < 8; i++)
         m_nTextureCoordinates.push_back( values[i] );
   }
   break;
   case OAG_TEXTURE_MAP_TRIANGLE:
   {
     //Triangle
     m_nNumberOfCoordinates = 6;
     float values[6] = { 0, 0, m_fWrapValue, 0, 0.5, m_fWrapValue };

     m_nTextureCoordinates.reserve(6);

     for(int i=0; i < 6; i++)
         m_nTextureCoordinates.push_back( values[i] );
   }
   break;
  }
}
许可
本文以及所有相关的源代码和文件均已获得The Code Project Open License (CPOL)的许可。
VC9.0 C++ Vista Windows Win7 WinXP OpenGL Dev 新闻 翻译